
CS 1.6 Model Editor
Open a Counter-Strike 1.6 model in your browser: watch it, repaint it, take it apart
Drop a .mdl file below and it shows up in 3D with all its animations and sounds. From there you can recolour a texture, put a picture or your nickname on it, look at the hitboxes and download the changed model, ready for the game.
No model at hand? Pick one of the ready ones under the drop box. It works with weapons, knives and player models from Counter-Strike 1.6 and Half-Life. Nothing to install.
Opening CS 1.6 MDL Models
Your own file or one of the ready ones
Drag a .mdl file onto the box at the top of the page, or press Pick files. A second later the model is on screen. The file on your computer is not touched - every change stays on the page until you press Download.
- Your own file
-
Any CS 1.6 or Half-Life model:
v_ak47.mdl,v_knife.mdl,gign.mdland so on. Models from CS:GO, CS2 and other Source games are a different format, and the page tells you so. - Split models
-
Some models come in several files:
name.mdl,nameT.mdlwith the textures andname01.mdl,name02.mdlwith the animations. Select them all and drop them together. If one is missing, the page names the file it needs. - Ready models
- Under the drop box there is a row No model at hand? Try one. Click a name and the model opens. You can change it and download it like your own.
- Your own sounds
-
If your skin came with its own
.wavfiles, drop them with the model or later, onto the open model. They play in place of the standard ones.
Where CS 1.6 Keeps Its Models
On Steam the folder is Steam\steamapps\common\Half-Life\cstrike\models. Player models are stored in separate folders under models\player, for example: models\player\gign\gign.mdl. The first letters of a weapon file tell you where the game uses it:
| File | What it is | Worth editing? |
|---|---|---|
v_ak47.mdl |
The weapon in your own hands, with the arms and all the animations. | Yes, this is the one you look at all game. |
p_ak47.mdl |
The weapon in another player's hands. | Small and far away, rarely. |
w_ak47.mdl |
The weapon lying on the ground. | Rarely. |
player\gign\gign.mdl |
A player model. | Yes. |
3D Model Viewer
Turn the model, play its animations, hear its sounds
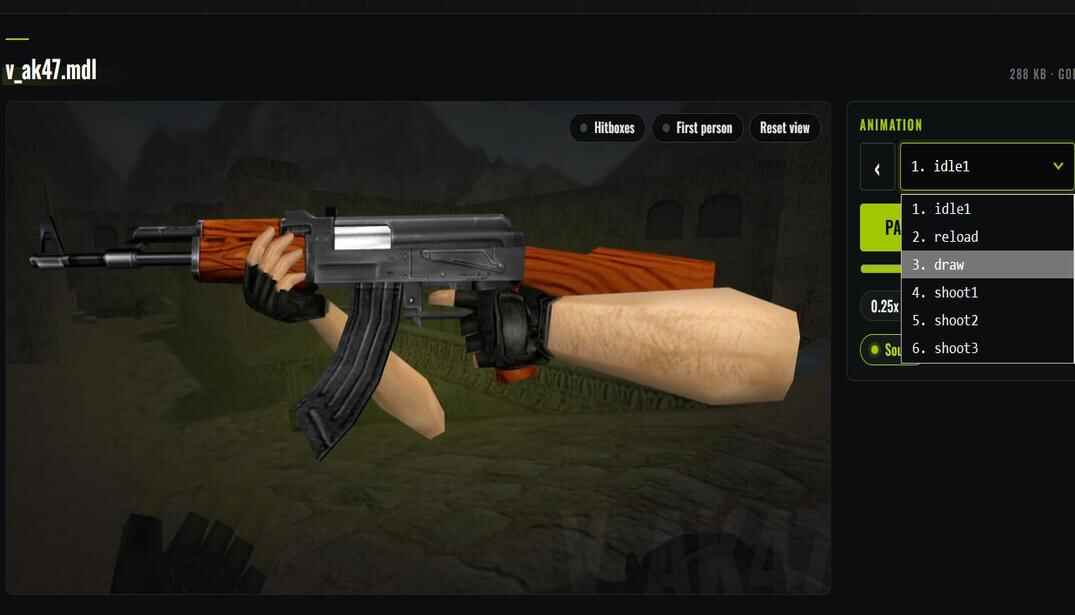
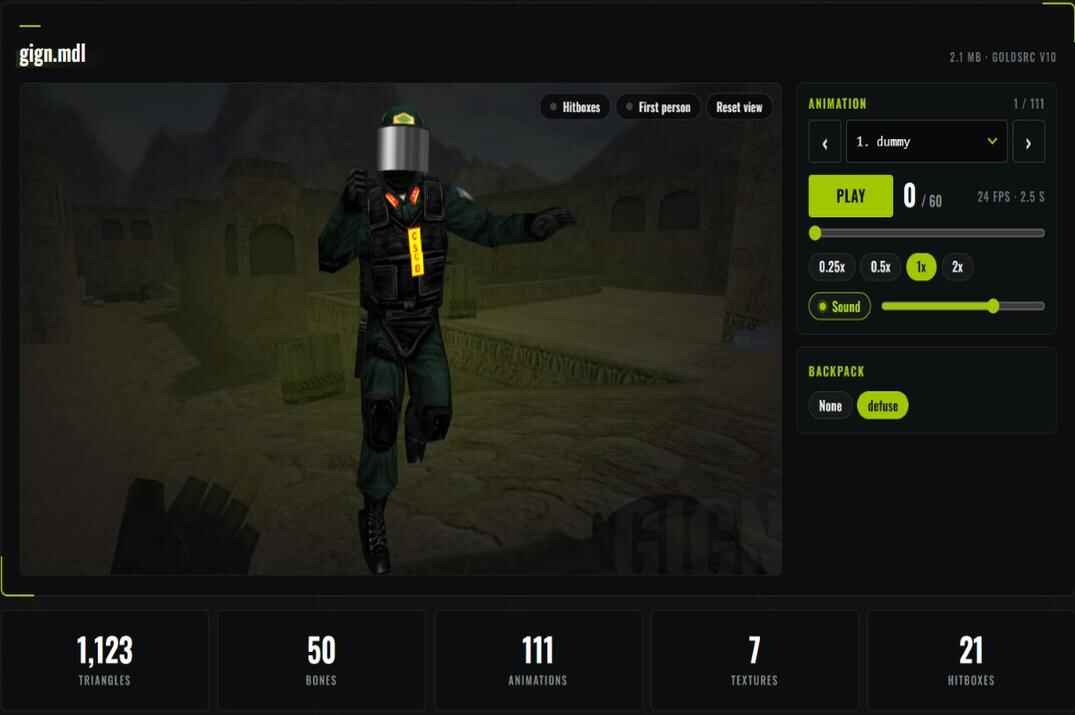
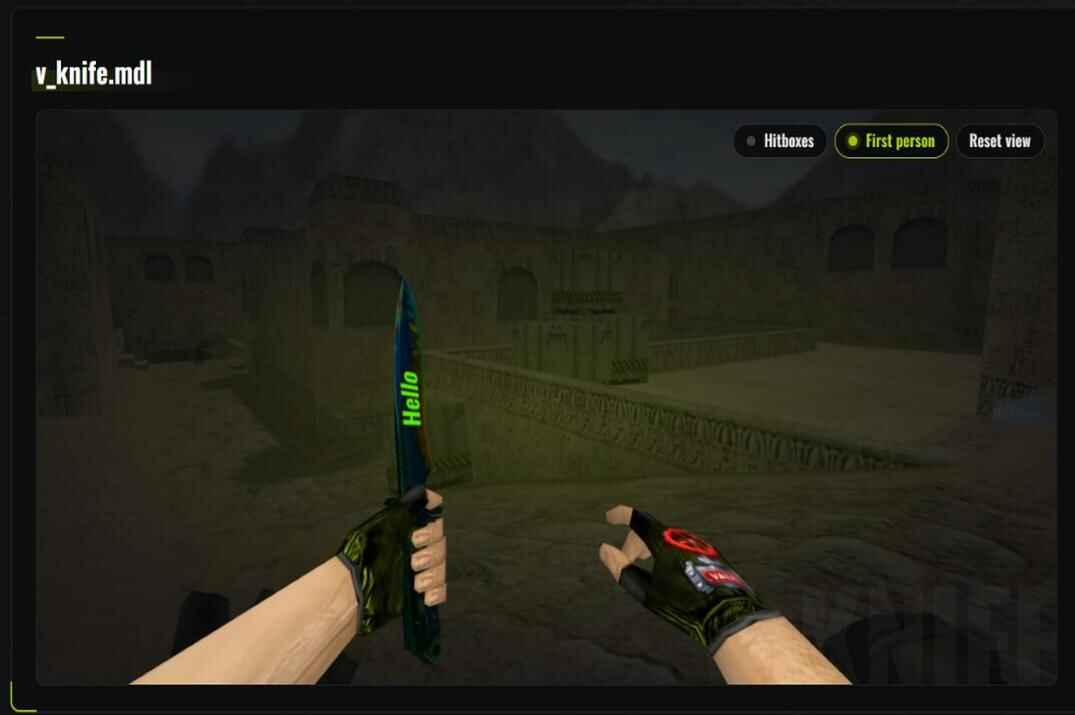
The model sits in the big window on the left, the controls are on the right. A weapon in hands (v_) opens the way you see it in the game, from first person. Everything else opens from the outside.
- Mouse
- Drag to turn the model, wheel to zoom, right button to move it. On a phone: drag with one finger, pinch with two. Reset view puts the camera back.
- First person
-
The button in the corner of the window switches between the view from your eyes and the view from outside. In first person the weapon is on the right, like in the game with the default
cl_righthand 1. - Animations
- Pick one from the list or step through them with the arrows. Pause stops it, the slider goes frame by frame, 0.25x to 2x change the speed. Under the buttons you see the speed in frames per second and the length in seconds.
- Sounds
- Reload, bolt and draw sounds play on the frame the model asks for them, shots and knife swings play with their animations. The list under the speed buttons shows each sound and its frame - click a line to jump there and hear it. The Sound switch and the slider next to it are the mute and the volume.
- Body and skins
- If the model has parts to choose from, they show up as buttons: the backpack and the defuse kit on player models, for example. Models with several skins get a Skin row.
- Small window
- When you scroll down to the textures, the model moves into a small window in the corner and stays in sight. Drag it by its top bar if it is in the way, ↑ takes you back up, × hides it.
Browsers may block audio playback until you interact with the page. Click the model once to enable sound.
Viewing and Replacing Textures
The pictures a model is painted with
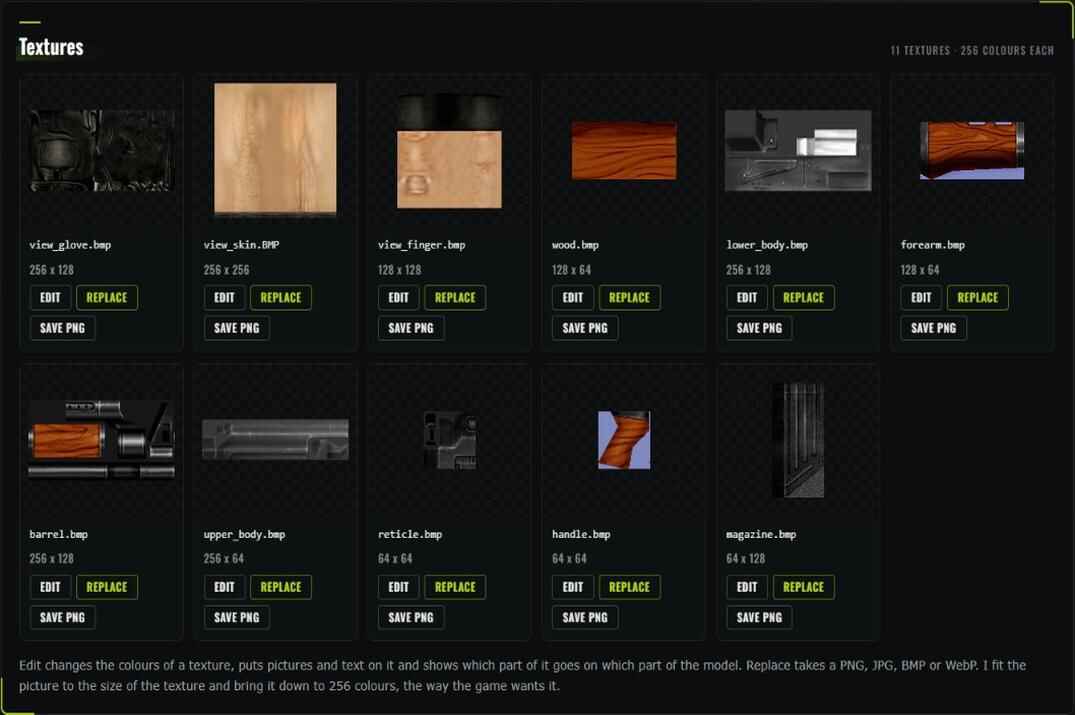
A model is a shape with pictures stretched over it. Those pictures are its textures, and changing them is what makes a skin. The Textures block lists them all with their names and sizes. An AK-47 in hands has eleven: gloves, skin, wood, barrel, magazine and so on.
- Save PNG
- Downloads the texture as a picture. Open it in Photoshop, Paint or anything else, change it, then put it back with Replace.
- Replace
- Puts your picture in place of the texture. PNG, JPG, BMP and WebP work, and you can simply drop the picture onto the texture's card. The picture is fitted to the size of the texture, so draw it in the same proportions.
- Edit
- Opens the editor right on the page: colours, pictures, text, size. That's the next section.
A CS 1.6 texture holds 256 colours, that's the format. Your picture is brought down to 256 when it goes in. On a photo you may notice it, on a drawing or a logo you won't. A picture that already has 256 colours or fewer goes in exactly as it is.
After any change a bar appears under the model: The model has changes, with a Download button. Change as many textures as you want and download once at the end.
Texture Layout and UV Mapping
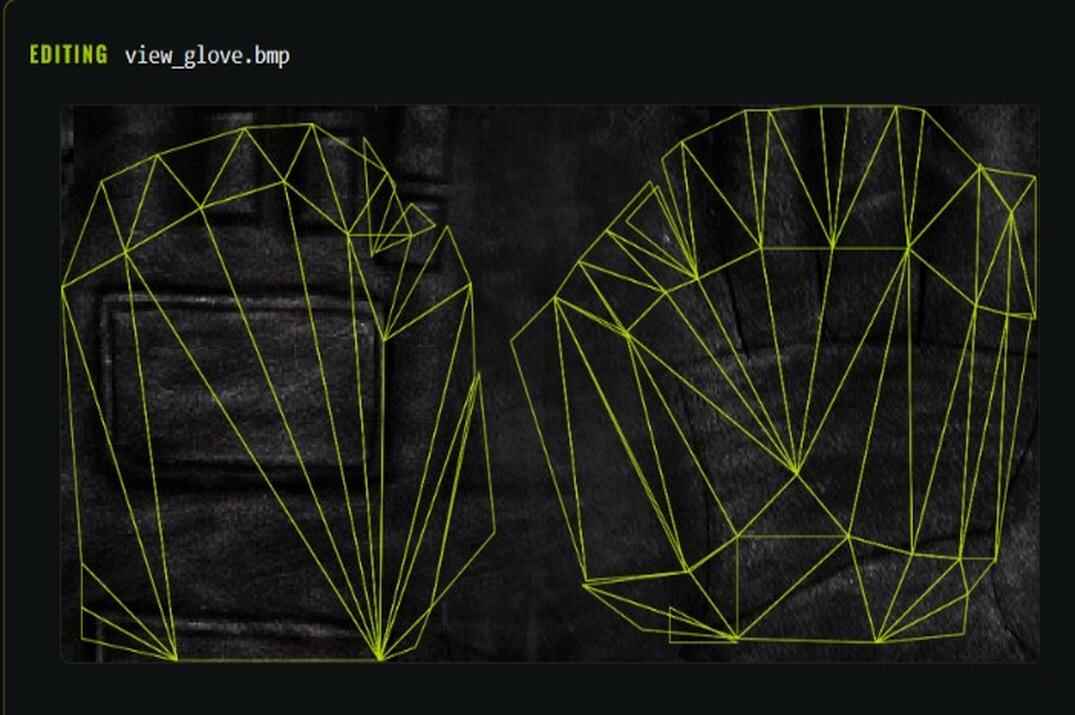
Open a texture with Edit and you see lime lines over it. Each triangle is a piece of the model, and what is inside it ends up on that piece. Anything outside the lines never shows in the game. If you draw in Photoshop, Save layout PNG gives you these lines as a see-through picture to put on a layer above your drawing.
Editing Skins and Textures
Colours, pictures and text without leaving the page
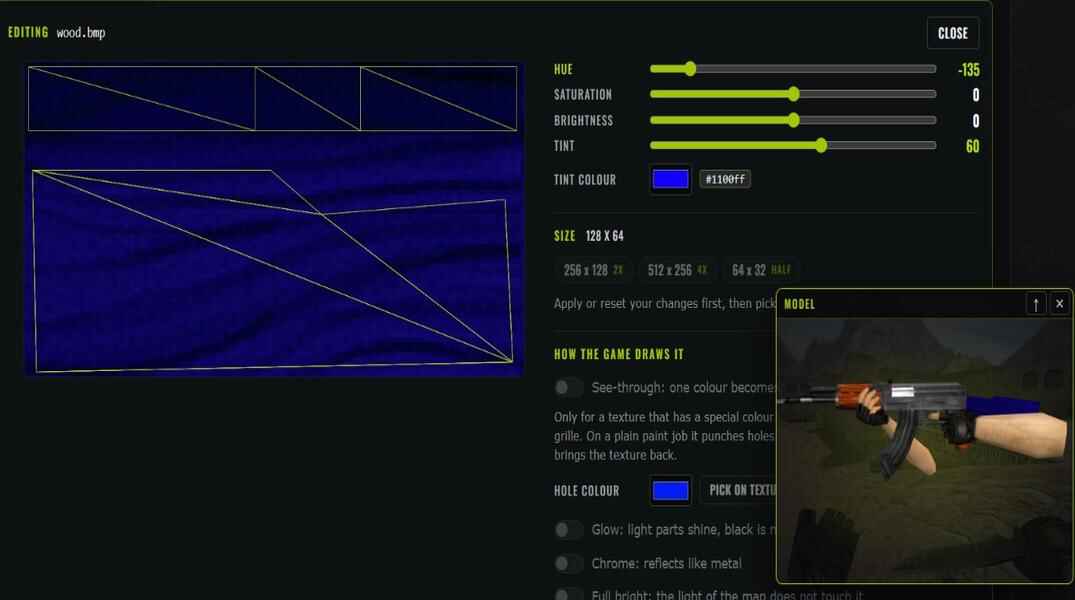
Press Edit under a texture. The editor opens below the list: the texture on the left, the controls on the right. The model changes while you move a slider, so you see the result straight away. Nothing is final until you press Apply. Reset throws the changes away, Close shuts the editor.
Colours
Four sliders. Hue turns one colour into another - brown wood into green or blue. Saturation makes colours stronger or greyer. Brightness makes the texture lighter or darker. Tint paints the whole texture in the colour you pick next to it and keeps light and dark where they were, so the detail stays.
Pictures and Sprays
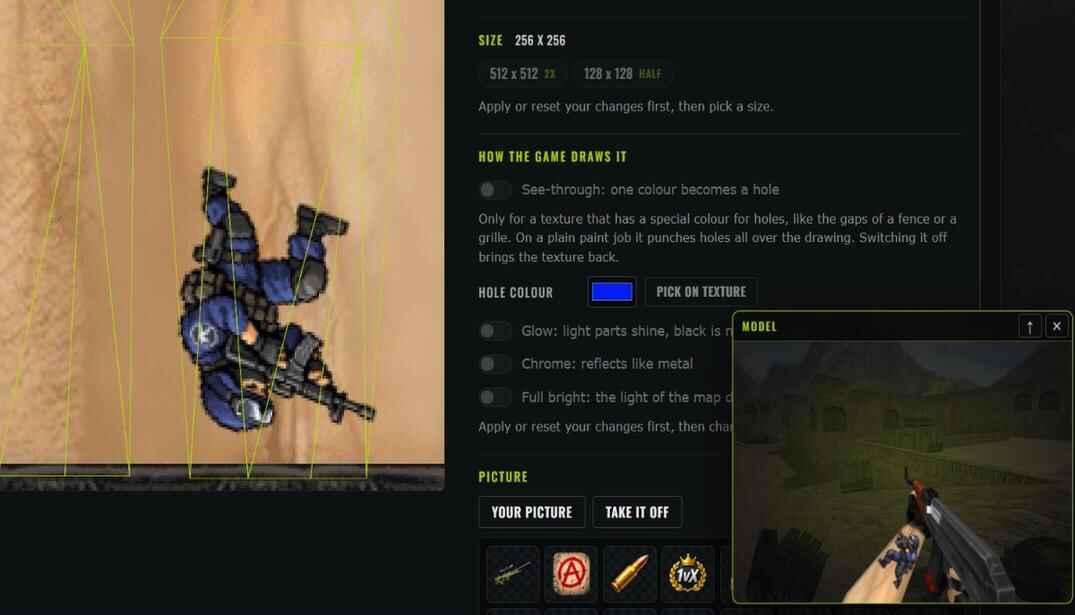
The Picture block has a grid of pictures to choose from, and Your picture for one of your own. Click a picture and it lands on the texture. Drag it where you want it, set Size and Turn. A PNG with a see-through background works best - with a JPG you get the whole rectangle, background included.
The Sprays group holds the logos from the game. They are white drawings on black, so they go on as sprays: black disappears and the drawing takes the colour you choose in Spray colour. The Spray switch does the same to any picture, your own too.
Text
Type into Text and it appears on the texture. There are six fonts, a size, a turn, a colour and an outline with a colour of its own. Drag the text on the texture to move it.
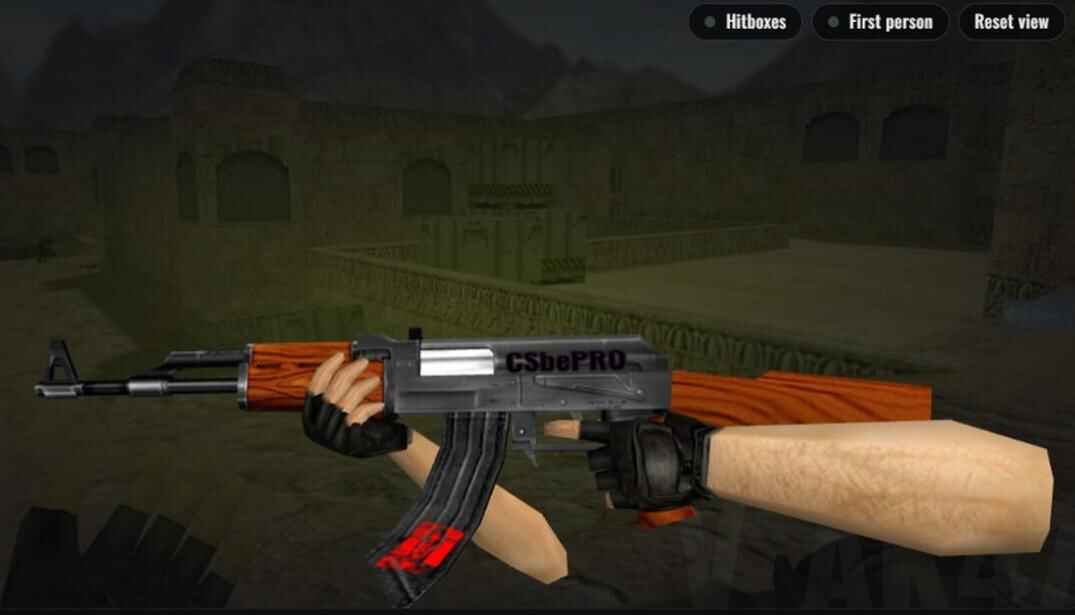
On v_ weapon models, text needs to be mirrored to read correctly in first person. The game flips these models to put the weapon in your right hand, and a normal line would read mirrored. Mirror the text takes care of it and is already on for v_ models. The first person view on the page flips the model the same way, so what you read there is what you get in the game.
Placing Text and Images on the 3D Model
Finding the right place on a flat texture takes a few tries. It is quicker to point: click the spot on the model where the text or the picture should go. The editor opens on the right texture and puts it there. Click another spot and it moves. A short click picks a spot, dragging still turns the model.
Some models paint both sides from one piece of the texture - the sleeves of a player, for example. Write on the left sleeve and the same text shows up on the right one. That is how the model was made, not something the page can change.
One picture and one text at a time. Press Apply, they become part of the texture, and you can add the next ones.
Texture Size
Why text comes out blocky and how to make it sharp
Standard CS 1.6 textures are tiny. The wood of an AK-47 is 128 x 64 pixels, and it covers the whole stock. Text on it is built from those same few pixels, so the letters come out as big squares, and a small line doesn't fit at all.
The fix is to make the texture bigger first. In the editor, the Size block shows the current size and the sizes you can switch to: 2x, 4x, sometimes 8x, up to 512 pixels on the long side. That's the most the game takes.
- Press Edit under the texture you want to write on.
- In Size press the biggest size offered, for example 512 x 256.
- Now add your text or picture and press Apply.
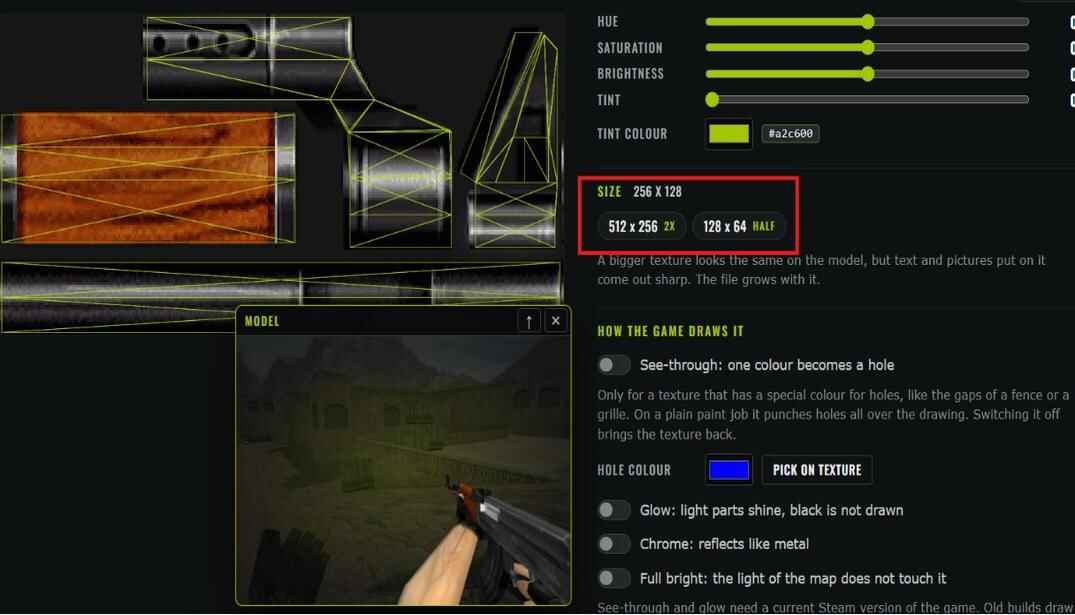
Making a texture bigger doesn't change how the model looks. Every old pixel just becomes a block of new ones, the same colour. What changes is everything you put on it afterwards: text, pictures and sprays come out sharp, and a picture you bring in with Replace keeps four times the detail in each direction.
The file grows with it. An AK-47 goes from 288 KB to about 420 KB with one texture at 512 x 256. On your own PC that doesn't matter. If you put the model on a server, players download it, so don't blow up textures you aren't going to change.
Size buttons are off while you have changes that are not applied. Press Apply or Reset first.
Texture Effects: Glow, Chrome and Transparency
See-through, glowing and chrome parts
Each texture can tell the game to draw it in a special way. The switches are in the editor, under How the game draws it. They work at once, and switching one off puts things back.
- Glow
- Light parts of the texture shine and black is not drawn at all. Good for sights, lamps and eyes. On a whole weapon it turns it into a ghost.
- Chrome
- The part reflects like polished metal. The visor of the GIGN helmet is done this way. Chrome ignores the layout: the texture slides over the part as you turn it.
- Full bright
- Shows the texture at full brightness in the editor. Standard CS 1.6 may not reproduce this effect in-game.
- See-through
- One colour of the texture becomes a hole. This is for textures drawn with a special colour for the gaps, like a fence or a grille. Press Pick on texture, click that colour, then switch See-through on.
On an ordinary paint job See-through punches holes all over the drawing, because there is no special colour in it. The page tells you how much of the texture became a hole. If that is a third of it, the colour was part of the drawing - switch it off and the texture comes back as it was.
Glow and See-through use GoldSrc's additive and masked texture modes. Their appearance may vary between game builds and renderers.
View and Edit CS 1.6 Hitboxes
The boxes the game checks your shots against
The game doesn't check a bullet against the model itself. It checks it against a set of invisible boxes around the head, chest, stomach, arms and legs. Press Hitboxes in the corner of the model window and you see them, moving with every animation. Run a crouch or a jump and watch where the head box goes.
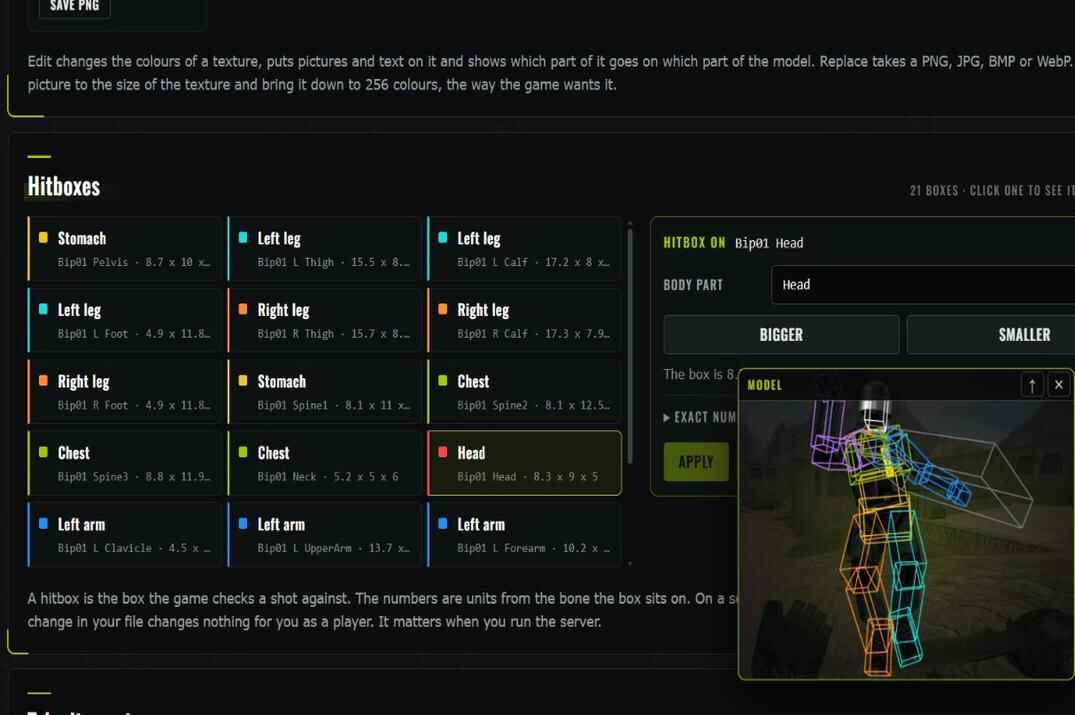
| Colour | Body part |
|---|---|
| Red | Head |
| Green | Chest |
| Yellow | Stomach |
| Blue and purple | Left and right arm |
| Cyan and orange | Left and right leg |
| Grey | Shield. Attached to the left hand |
The Hitboxes block below the textures lists every box with its body part, its bone and its size. Click a line and that box turns white on the model. Bigger and Smaller change it by a tenth, Body part changes what it counts as, Apply writes it into the model. Exact numbers opens the two corners of the box for those who need them.
A bigger head box in your own file gives you nothing. Hits are counted on the server, with the server's copy of the model. Changing hitboxes makes sense only when you run the server and put the model there.
Installing Edited Models in CS 1.6
Where the file goes and how to get the old one back
The downloaded file has the same name as the one you opened. The game picks it up by that name, so don't rename it.
- Close the game.
- Open
Steam\steamapps\common\Half-Life\cstrike\models. For a player model go on intoplayerand the folder with the model's name. - Copy the original file somewhere safe.
- Put the downloaded file in its place.
- Start the game and take the weapon in your hands.
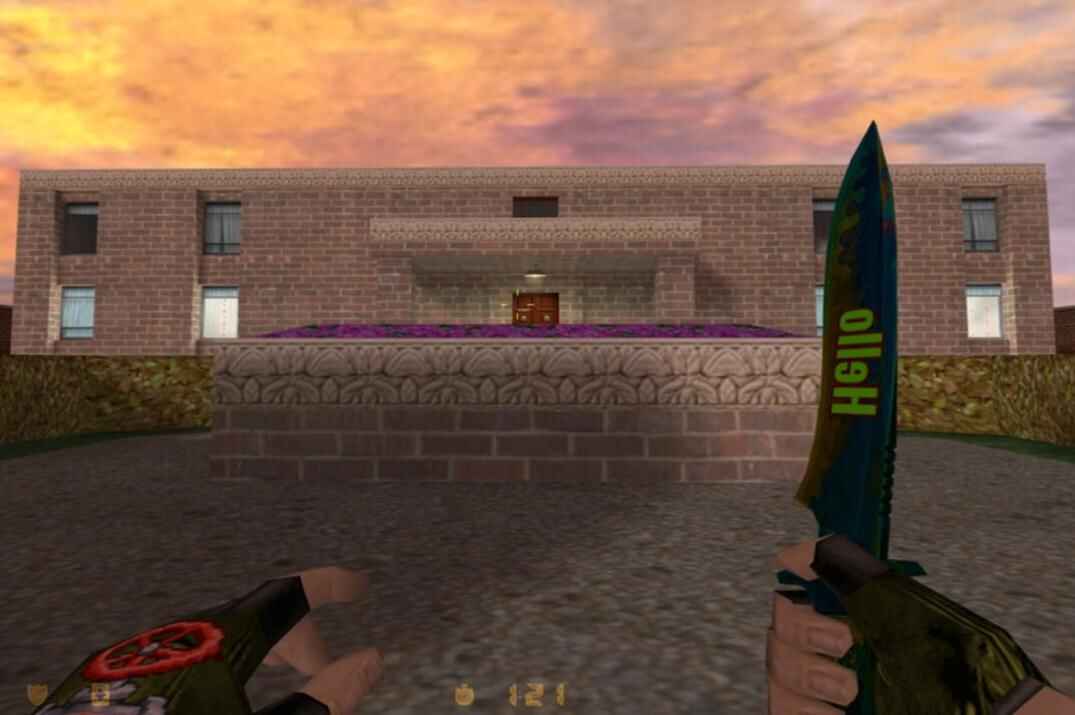
Only you see your skin. Other players see the models from their own game folders.
To go back, put the saved original in place. If you didn't keep it, Steam restores every standard file: right-click the game in the library, Properties → Installed Files → Verify integrity of game files.
Some servers check a few of your files against their own (mp_consistency 1) and don't let you in if one differs. If a server refuses you after you changed a model, put the original back for that server.