Why Crosshair Settings Matter in CS2

Think of your crosshair as your anchor, it’s what your eyes rely on to stay locked onto targets. A crosshair that’s too large, too small, or poorly colored can make it harder to line up headshots or track moving opponents. A well-tuned crosshair helps you aim faster, shoot more accurately, and stay consistent no matter the map or lighting.
Customizing your crosshair can help you:
- Track targets more easily
- Cut down on visual distractions
- Improve accuracy and spray control
How CS2 Crosshair Settings Work
Every movement of the crosshair is tied to player motion, weapon behavior, and your personal perception of space on the screen. Even with the same sensitivity, two players can end up with a completely different feel because of their crosshair settings.
How to Change Crosshair Settings in CS2
The easiest way to adjust your crosshair is through the in-game settings menu. It allows you to instantly see how changes affect the crosshair without typing commands or restarting the game.
To change it:
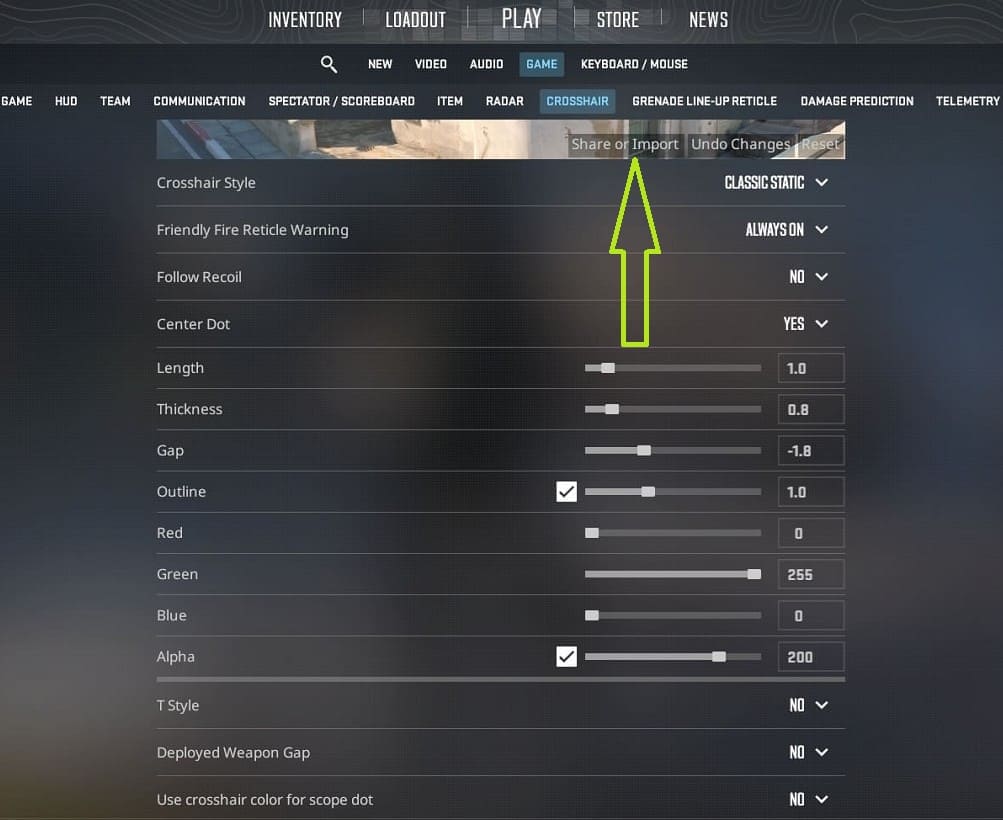
- Launch CS2 and open Settings (gear icon)
- Go to the Game tab and select Crosshair tab

The preview window updates in real time, which makes it perfect for adjusting size, gap, color, and outline while visually checking readability and balance. This method works fine for quick adjustments and suits players who prefer a visual style.
Crosshair Settings Menu vs Console Commands
The settings menu is designed for convenience, but the console is built for precision. While the menu covers most common options, console commands allow exact numeric values, negative gaps, and easy sharing or restoring of configurations.
Using console commands is especially useful if:
- You want pixel-precise control
- You switch between multiple crosshairs
- You share settings between accounts or teammates
- You need full consistency after updates or resets
In practice, the best approach is combining both: use the menu to find a comfortable look, then fine-tune and lock it in using console commands. That way your crosshair stays exactly the same every time you play.
CS2 Crosshair Settings Explained
CS2 crosshair settings control how your aim reference behaves while you move, shoot, and track targets. Small changes here do not just affect how the crosshair looks - they also change how quickly your eyes read spacing, alignment, and overall clarity in a fight. What matters here is not how the crosshair looks, but how predictable and readable it remains under pressure.
Crosshair Style
The crosshair style defines how your crosshair reacts to movement and shooting or stays completely static. In CS2, there are three main styles available. Two of them are dynamic and expand or contract based on movement and firing, while the static style remains unchanged at all times.
Dynamic crosshairs can help players understand movement penalties and timing, especially during early practice. However, in real matches they often create visual clutter during burst fire and quick peeks from cover. That constant movement can distract your eyes from the target itself.
The static style removes this distraction entirely. As a result, most experienced and professional players prefer the classic static crosshair because it provides a more stable and predictable visual reference, especially when taking the first shot.
Available styles:
- Classic - expands and contracts with movement or shooting
- Classic Static - remains fixed at all times
- Legacy - expands and contracts when shooting
Console command:
cl_crosshairstyle [2/4/5]
2 - Classic
4 - Classic Static
5 - Legacy
Friendly Fire Reticle Warning
Displays a visual indicator when aiming at teammates to avoid accidental friendly fire.
cl_crosshair_friendly_warning 1/0Follow Recoil
Follow Recoil makes the crosshair move according to the weapon’s recoil pattern. Instead of showing where you should aim, it shows where the gun is currently pulling.
This setting can be useful for learning spray patterns in training, but in real matches it often becomes distracting. During intense fights, your focus should stay on the target, not on chasing a moving reticle. For most competitive players, Follow Recoil is better left disabled once recoil basics are learned.
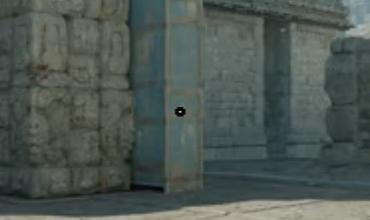
cl_crosshair_recoil 1/0Center Dot
The center dot adds a single pixel point in the middle of the crosshair. Its main purpose is to provide a precise reference for tapping and long-range shots.


Some players like the added clarity for head-level alignment, while others find it unnecessary or visually cluttered. Using a center dot comes down to personal preference, but it’s most effective with small, tight crosshairs rather than large or wide setups.
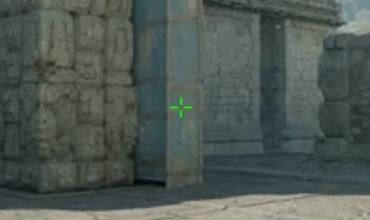
cl_crosshairdot 1/0Crosshair Length (size) and Thickness
Size controls how long the crosshair lines are, while thickness determines how bold they appear on screen. These two settings work together to define readability.
A smaller crosshair improves precision for tapping and long-range fight, but can become hard to see during fast movement. Increasing thickness slightly can improve visibility without sacrificing accuracy. The key is finding a balance where the crosshair is always visible but never blocks the target.
cl_crosshairsize [0.1 to 10]
cl_crosshairthickness [0.1 to 6]
Gap
The gap controls the space between the crosshair lines and the center point. This setting directly affects how easily you can judge head-level alignment and recoil spread.
A small or slightly negative gap creates a tight crosshair that feels precise, especially for rifles. Larger gaps can make tracking movement easier but reduce accuracy for fine aim. Alignment should always feel natural - if you’re constantly adjusting your aim micro-movements, the gap is probably off.
cl_crosshairgap [-5 to 5]Outline and Visibility
Outlines add a border around the crosshair lines, improving contrast against bright or complex backgrounds. This is especially useful on maps with mixed lighting or detailed textures.
Too much outline thickness can make the crosshair feel bulky, while too little may not solve visibility issues. A subtle outline usually provides the best result: enough contrast to stay visible, without overpowering the center of the screen.
cl_crosshair_drawoutline 1/0
cl_crosshair_outlinethickness [0.1 to 3]
Crosshair Color Customization and Alpha (transparency)
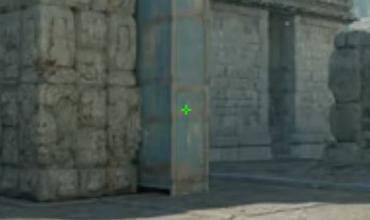
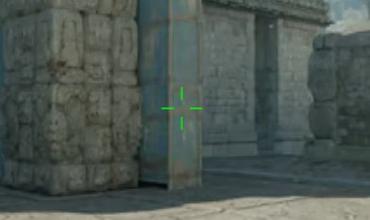
Color choice affects how quickly your eyes can lock onto the crosshair in different environments. High-contrast colors tend to work best, especially on maps with varied lighting.
Choose a color that contrasts well with the game’s environment. For example, black crosshairs are created by setting all values to 0, while white is achieved with 255 in all three RGB components.
Alpha controls transparency. A fully opaque crosshair is easier to track during sprays, while a slightly transparent one can feel cleaner during precise aim. The best choice is one that remains visible in all situations without drawing unnecessary attention.

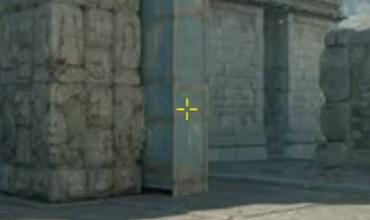
cl_crosshaircolor [0-5]- 0 - Red
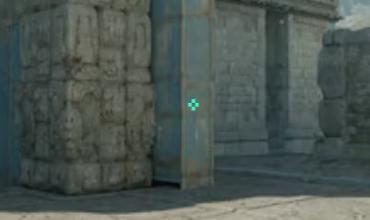
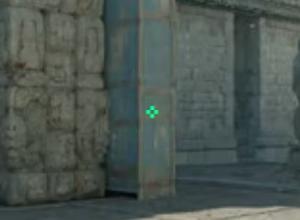
- 1 - Green (default)
- 2 - Yellow
- 3 - Dark Blue
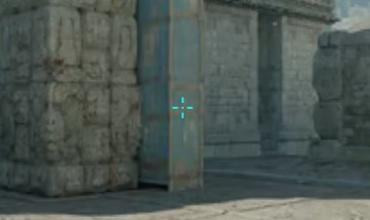
- 4 - Light Blue
- 5 - Your Custom Color (RGB)
For custom colors, fine-tune the RGB values using commands below, for example, black crosshairs are created by setting all values to 0, while white is achieved with 255 in all three RGB components:
cl_crosshaircolor_r [0-255]
cl_crosshaircolor_g [0-255]
cl_crosshaircolor_b [0-255]
cl_crosshairusealpha 1/0
cl_crosshairalpha [0 to 255]
T-Style Crosshair
T-Style removes the top line of the crosshair, leaving an open view above the center point. This can help keep the target unobstructed, especially when aiming at head level.

Some players find T-Style improves clarity during peeks and sprays, while others prefer the symmetry of a full crosshair. It doesn’t offer a direct accuracy advantage - it simply changes how much visual space the crosshair occupies.
cl_crosshair_t 1/0Deployed Weapon Gap
When enabled, this option dynamically adjusts the crosshair gap behavior based on the currently equipped weapon. Instead of using a fixed gap value, the game applies internal weapon-specific spacing, which can help maintain visual consistency when switching between pistols, rifles, and SMGs.
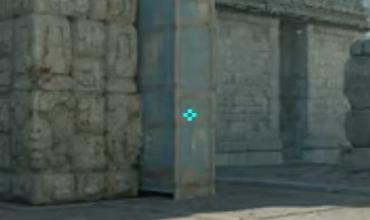
cl_crosshairgap_useweaponvalue 1/0Use Crosshair Color for Scope Dot


This setting allows the scope dot color for AUG and SG 553 to match your regular crosshair color. By default, the scope dot is green, regardless of your main crosshair color.
cl_ironsight_usecrosshaircolor 1/0Show Player Crosshairs
Controls if other players’ crosshairs are visible while spectating.
cl_show_observer_crosshair [0/1/2]
0 - No
1 - Frends and Party
2 - Everyone
Show my crosshair when spectating bots
Determines which crosshair is shown when spectating bots. This setting mainly affects practice games with bots.
cl_observed_bot_crosshair [0/1/2]
0 - Always
1 - When I can take over bot
2 - Never
Delay Sniper Rifle Un-Scope after Shot
Adds a short delay before automatically un-scoping after firing a sniper rifle.
A small delay allows you to briefly see the result of the shot and can help with follow-up awareness after a miss. Disabling the delay returns control faster, making repositioning smoother and removing unnecessary animation. This setting provides no direct shooting advantage and is purely a matter of preference.
cl_sniper_delay_unscope 1/0Show Scoped Sniper Rifle Inaccuracy
Displays a dynamic inaccuracy indicator inside the sniper scope. The visual element reacts to movement and weapon spread.


In theory, this can help newer players understand scoped accuracy timing. In practice, most experienced players disable it, as it adds visual noise to weapons that rely on precision and clean sightlines.
cl_sniper_show_inaccuracy 1/0For a detailed breakdown of this feature, see: Restore the Classic AWP Scope in CS2 (2025 October CS2 Update)
Auto Re-Zoom Sniper Rifle after Shot
Automatically returns to Zoom1 or Zoom2 after firing sniper rifles such as the AWP or SSG 08.
This setting is often enabled by players who prefer staying scoped between shots, while others disable it for faster repositioning and better situational awareness.
cl_sniper_auto_rezoom 1/0Sniper crosshair thickness
This command controls the thickness of the sniper scope crosshair lines when scoped in with weapons like the AWP or SSG 08. Lower values produce a thin, precise scope crosshair, while higher values increase visibility on bright maps or at lower resolutions.
cl_crosshair_sniper_width [1–6]The in-game settings menu limits this value to a maximum of 6. However, the console itself does not enforce a strict upper limit. When using extreme values through the console, the crosshair lines continue to scale far beyond the menu range.


At very high values (around cl_crosshair_sniper_width 650 and above or -1), the scope lines will expand enough to completely block the scoped view, effectively resulting in a near-black screen.
Scope dot scale
Controls the size of the scope dot used by AUG and SG 553 when scoped in.
cl_ironsight_dot_scale [0.10-2.00]By carefully adjusting these settings, you can create a crosshair that perfectly matches your playstyle. Experiment with different configurations to determine what improves your accuracy and comfort the most.
CS2 Crosshair Settings by Resolution and Aspect Ratio
Your resolution and aspect ratio directly affect how a crosshair looks and feels in CS2. The same settings can appear clean and precise on one setup, but oversized or blurry on another. Because of this, crosshair tuning should always take resolution into account, especially if you switch between native and stretched formats.
Best Crosshair for 16:9 (1080p / 1440p)
On native 16:9 resolutions, the crosshair appears closest to its true proportions. Lines stay sharp, spacing feels natural, and small adjustments are easier to read visually.
For 1080p and 1440p, a compact static crosshair with a moderate gap works best. You don’t need to compensate for stretching, so focus on clarity and precision rather than size. Thin lines and a tight gap help with head-level alignment, while a subtle outline ensures visibility across all maps.
This setup is ideal for players who value accuracy, clean visuals, and predictable aim behavior.


Best Crosshair for 4:3 Stretched
In 4:3 stretched mode, the crosshair becomes wider and visually thicker due to horizontal stretching. If you use the same values as 16:9, the crosshair can feel oversized and imprecise.
To compensate, reduce size and gap values. Slightly thinner lines help restore balance, while a smaller overall crosshair keeps aiming tight and controlled. Many players prefer this setup because it emphasizes targets and simplifies visual tracking, but it requires careful tuning to avoid clutter.
A tight, minimal crosshair works best here, especially for rifles and fast-paced engagements.
Pro Player Crosshair Codes (Updated 2026)
Pro player crosshairs are often treated as the "correct" choice, but in reality, they are just examples - not a universal solution. Even at the highest level, players regularly tweak their crosshair depending on form, comfort, or tournament conditions.
Using a pro player’s crosshair can be helpful as a reference point, but it shouldn’t be copied blindly. What matters most is how the crosshair feels to you - how clearly you see it, how confident your aim feels, and how consistent you perform with it over time. Trends don’t win rounds. Comfort and confidence do.
CS2 Pro Player Crosshair Codes
Use these examples to explore different styles and ideas, not to chase trends. The best crosshair is always the one that feels natural to you and helps you stay consistent in game.
🇫🇷 Dan apEX Madesclaire

✨ Team Vitality
📅 February 9, 2025, Intel Extreme Masters Katowice 2025
🎯 Crosshair Code:
CSGO-8fcjw-trwPY-98uXV-7nWbf-ZbJaA🇺🇦 Valerij b1t Vakhovsjkyj
✨ Natus Vincere (NAVI)
📅 February 8, 2025, Intel Extreme Masters Katowice 2025
🎯 Crosshair Code:
CSGO-yxoDC-oHKmT-QwK3s-SQ9rE-HzQRO🇷🇺 Danil donk Kryshkovets

✨ Team Spirit
📅 February 9, 2025, Intel Extreme Masters (IEM) Katowice 2025
🎯 Crosshair Code:
CSGO-Jhfkc-4UpR6-DJftC-VfGek-pL3ED🇮🇱 Shahar flameZ Shushan
✨ Team Vitality
📅 January 15, 2025, BLAST Bounty Spring 2025
🎯 Crosshair Code:
CSGO-iVyCV-6tmzL-SKMdk-5PvRr-YMbEC🇸🇰 David frozen Čerňanský
✨ FaZe Clan
📅 February 4, 2025, Intel Extreme Masters Katowice 2025
🎯 Crosshair Code:
CSGO-qahCY-jRsVr-inX9t-zmTKn-LLUnB🇷🇺 Dzhami Jame Ali
✨ PARIVISION
📅 February 9, 2025, Intel Extreme Masters Katowice 2025
🎯 Crosshair Code:
CSGO-v7J4e-759Lf-9RKeL-RLDHB-bN3ED🇱🇹 Justinas jL Lekavičius

✨ Natus Vincere (NAVI)
📅 February 8, 2025, Intel Extreme Masters Katowice 2025
🎯 Crosshair Code:
CSGO-Mxeyh-vRNcz-xxyBf-WOMbM-DqmHB🇷🇺 Ilya m0NESY Osipov
✨ G2 Esports
📅 February 3, 2025, Intel Extreme Masters Katowice 2025
🎯 Crosshair Code:
CSGO-EvvTA-D6U88-mXTHk-acm3G-bkMHA🇧🇦 Nikola NiKo Kovač
✨ Team Falcons
📅 February 14, 2025, PGL Cluj-Napoca 2025
🎯 Crosshair Code:
CSGO-n3bzO-A97wQ-TYH9j-EBzrc-SLLTK🇪🇪 Robin ropz Kool
✨ Team Vitality
📅 February 9, 2025, Intel Extreme Masters Katowice 2025
🎯 Crosshair Code:
CSGO-MMQuh-Hs3Sj-Qv9zd-VaCmc-3QqNO🇷🇺 Dmitriy sh1ro Sokolov
✨ Team Spirit
📅 February 9, 2025, Intel Extreme Masters Katowice 2025
🎯 Crosshair Code:
CSGO-Ldro4-hDUZL-YBjBr-HRVSe-sqUWJ🇹🇷 İsmailсan XANTARES Dörtkardeş
✨ Eternal Fire
📅 February 14, 2025, PGL Cluj-Napoca 2025
🎯 Crosshair Code:
CSGO-xbpe2-E24RJ-YXNuO-pQvt8-ppNAK🇫🇷 Mathieu ZywOo Herbaut
✨ Team Vitality
📅 February 9, 2025, Intel Extreme Masters Katowice 2025
🎯 Crosshair Code:
CSGO-WnQHE-BTaKA-wHs7v-KR8QX-o2OtQHow to Import and Share Crosshair Codes in CS2
CS2 allows you to quickly import and share crosshair settings using built-in crosshair codes. This makes it easy to test different setups, save your own presets, or share a crosshair with friends without manually adjusting each value.
How to Import a Crosshair Code in CS2
Importing a crosshair code is the fastest way to apply a complete setup, while sharing your crosshair allows others to use the exact same settings without manual adjustments.
To do it:
- Launch CS2 and open Settings
- Go to the Game tab and select Crosshair
- Click Share or Import in the preview window
- Paste the crosshair code and press Import, or press Copy Your Code to share it
Once imported, the crosshair is applied immediately. You can then fine-tune individual settings if needed or keep it exactly as it is.
How to Copy Another Player’s Crosshair In-Game
You can copy another player’s crosshair directly during a game in just a few clicks. This is the fastest way to test a crosshair you like.


To do it:
- Press and hold TAB (
+showscores) to open the scoreboard - Hover your cursor over the player whose crosshair you want to copy
- Open the context menu with the right mouse button
- Click Copy Crosshair and release the TAB key
- Confirm the replacement
The selected crosshair is applied instantly and fully replaces your current settings. You can further tweak it afterward or export the code to save it as a backup.
CS2 Crosshair FAQ

Does the crosshair affect spray control in CS2?
Indirectly, yes. The crosshair doesn’t change recoil mechanics, but a stable and readable crosshair makes it easier to track spray patterns and keep your focus on the enemy model instead of visual noise.
Is Follow Recoil worth using in competitive matches?
For most players - no. Follow Recoil can help during training to understand spray patterns, but in real matches it often becomes distracting.
Do professional players always use the same crosshair?
No. Many pro players adjust or change their crosshair more often than people think, sometimes even between tournaments. Pro crosshairs should be seen as references, not permanent standards.
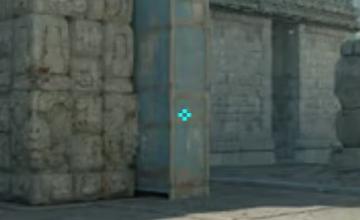
What crosshair color works best in CS2?
High-contrast colors like green, cyan, or light blue tend to work best across most maps. The key is visibility in different lighting conditions.
Can a crosshair improve FPS or performance?
No. Crosshair settings have no impact on FPS or system performance. They only affect visual clarity and aiming comfort.
Is there a "perfect" crosshair for everyone?
No. The best crosshair is the one that feels natural to you and stays consistent over time. Comfort and confidence matter far more than trends or copied settings.