Bloody Esports Interface Overview
Bloody Esports gives you deep control over the mouse settings, similar to software like Logitech G HUB, HyperX NGENUITY, or Razer Synapse. The interface is built around four main sections: Button, Sensitivity, Macro, and RGB.
Button Tab

The Button tab is responsible for assigning actions to mouse buttons. On my ES9 PRO mouse, there are nine available button functions by default:
- Right Button == Right Button
- Middle Button == Middle Button
- Scroll Up == Scroll Up
- Scroll Down == Scroll Down
- Forward == Forward
- Back == Back
- CPI+ == CPI+
- CPI- == CPI-
- RGB Cycling == RGB Cycling
The mouse actually has 10 buttons, and all of them become available for binding in other profiles. In the default Standard profile, however, the first Left Button is not shown in this list. Bloody Esports locks it on purpose, and similar mouse software usually does the same. If the main click button is remapped incorrectly, the mouse can become difficult to control, so this protection makes sense.
Each physical button can be remapped. For example, the side buttons can stay as Forward / Back, or you can replace them with keyboard keys, commands, macros, Windows shortcuts, or other actions.
Bloody Esports also supports profiles, just like G HUB, NGENUITY, and Synapse. Each profile can have its own setup for different tasks. In G HUB, profiles are tied to specific games, and automatic switching does not always work reliably. Bloody handles this differently: profiles are not locked to a specific game or application. You can activate any profile on the desktop, inside a program, or during a game by pressing the assigned key combination.
Sensitivity Tab

The Sensitivity tab controls CPI, polling rate, button response, and sensor calibration.
DPI means Dots Per Inch, and the term originally comes from screens and printing. CPI means Counts Per Inch, and it is the more accurate term for a mouse sensor. CPI describes how many movement counts the sensor registers when the mouse moves one inch. Technically, CPI is the correct term for mice, while DPI is often used in marketing to describe the same setting.
By default, the ES9 mouse uses five CPI stages: 1000, 1200, 1600, 2000, and 3200. You can edit these values, remove existing stages, or add new ones depending on how you want the mouse to feel.
The X or Y option in the upper-left area lets you adjust horizontal and vertical sensitivity separately. When it is disabled, both axes use the same value. When it is enabled, you can set different values, for example X = 1000 and Y = 800.
The Report Rate (Hz) block controls how often the mouse sends data to the computer. Available values include: 125Hz, 250Hz, 500Hz, 1000Hz and 2000Hz. For gaming, most players use 1000Hz or 2000Hz if the mouse and system can handle it without issues.
The Key Response block controls button response delay. Lower values make button input feel faster. For games, especially shooters, players usually choose the lowest available value because clicks, shooting, weapon switching, and movement binds all depend on fast input.
The Sensor Calibration block is used to adjust how the mouse behaves on different surfaces. It helps the sensor adapt to your mousepad and can affect tracking stability and lift-off behavior. There are two main options here: Preset and Calibration.
Calibration can be useful if the mouse feels unstable, the cursor shakes, the sensor loses tracking, the mouse works poorly on a specific pad, or it stops / continues tracking too early when you lift it from the surface.
The Sensitivity tab matters because CPI affects mouse sensitivity before any in-game sensitivity settings are applied.
RGB Tab

The RGB tab controls mouse lighting. By default, Bloody Esports includes several lighting effects:
- All black
- Blue breath
- Cyan breath
- Green breath
- Light Effect 6
- Purple breath
- Red breath
- Red shine
- Light Effect 1
- Light Effect 2
- Light Effect 3
- Light Effect 4
- Light Effect 5
The effects are also grouped by type: Full Color, Animation and Algorithm.
The "File" option in the upper-left corner allows you to export and import RGB lighting effects.
Also, to the right of the RGB button, there is a small lightbulb-shaped icon. It controls the LED brightness, and you can also use it to turn the mouse lighting off completely.
How Macros Work in Bloody Esports

In Bloody Esports, a macro works the same way it does in many other mouse software tools: it is a recorded or manually created sequence of inputs.
A basic macro can look like this:
first input press -> X ms -> first input release -> X ms -> second input press -> so onBloody Esports can also handle more than one input at the same time, just like G HUB or Synapse. This matters when two or more buttons need to overlap for a short moment.
A good example is a Jump Throw macro. It first has to pull the grenade pin with +attack, then almost instantly trigger the jump with +jump. In this case, the macro controls two inputs, and the structure looks closer to this:
first input press -> X ms -> second input press -> X ms -> first input release -> X ms -> second input releaseYou can record or manually add mouse clicks, keyboard presses, delays, repeat behavior, and button combinations, then assign the finished macro to a mouse button. To be honest, recording simple macros in Bloody Esports does not feel as smooth as it does in G HUB, but manual editing is actually faster and more comfortable once you get used to the icons.
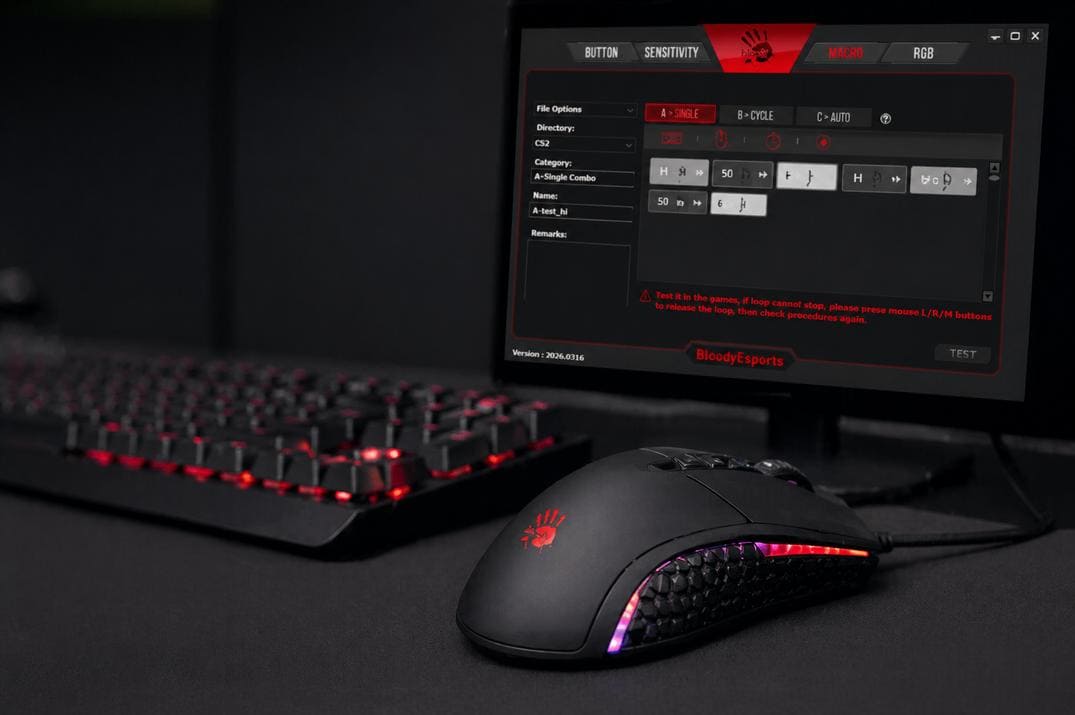
MACRO Tab Overview in Bloody Esports
The MACRO tab in Bloody Esports is the built-in editor for creating command sequences. It can be used for simple one-time actions, repeating loops, or toggle-based macros. After that, the macro should be saved as a file and assigned to a mouse button.
Macro Types in Bloody Esports
In the upper-right part of the editor, Bloody Esports has three macro modes: Single, Cycle, and Auto.
Single is a normal one-time macro. It runs once after you press the assigned button. Example:
h press -> 50 ms -> h release -> 75 ms -> i press -> 50 ms -> i releaseThis will type: hi
The mode is useful for simple key combinations, quick commands, software actions, basic game actions, or office automation.
Cycle is a loop macro that keeps running while you hold the assigned button. Using the same "hi" example, the macro would keep typing while the button is held: hihihihihihihihihihi
To stop it, you simply release the button.
Auto works almost like Cycle, but you do not need to hold the button. It works as a toggle: press once, and the macro starts looping. Press the same button again, and the macro stops.
Macro Creation Icons
Under the macro modes, there are four main icons for creating and recording macros.
The keyboard icon inserts keyboard inputs. The mouse icon inserts mouse button inputs. The timer icon adds a delay, which is one of the most important parts of any macro because timing controls how the whole sequence behaves. The record icon is used for recording live actions.
Recording is better for longer or more complex actions. You press Record, perform the actions with your mouse and keyboard, and Bloody Esports saves the sequence together with delays. After recording, the macro should usually be cleaned up: remove extra actions, fix delays, and delete any accidental inputs.
Macro File Management
To the left of the macro modes, there is a file management area. Bloody Esports does not assign a raw macro directly. First, the macro is saved as a .bmc file, and then that file is bound to the needed mouse button inside the selected profile.
The fields Directory, Category, Name, and Remarks are informational. They show the macro location, macro type, macro name, and notes.
File Options allows you to create, edit, open, and delete folders or macro files. The logic is similar to config file locations in CS2: macros are loaded from a specific parent folder, and inside that folder you can create your own categories and subfolders.
This is useful because you may have different macro groups for office work, desktop actions, software, and games. Inside the games folder, you can also create separate folders for different games.
By default, the parent folder path is:
C:\Program Files (x86)\BloodyEsport\BloodyEsport\Data\Mouse\English\ScriptsMacros\GunLib\This folder already contains preset macro folders. You can test them if you want, but most of them are not really useful and can be safely removed.
After deleting them and restarting Bloody Esports, the program may complain that the last used folder is missing. More precisely, it may complain about missing None.bwd and Setting.ini files. Just click OK, create one new folder and one macro inside it, and the settings files will be generated automatically. After that, Bloody Esports will stop showing the warning on startup.
How to Create and Run a Macro in Bloody Esports
Creating a macro in Bloody Esports is a simple left-to-right and right-to-left process. On the left side, you choose or create a folder in File Options. On the right side, you select the macro type, and Bloody Esports will immediately ask you to create a macro file. After that, it assigns the file category and name. Then you add the needed input sequence, go back to the left side, and save the macro through File Options.
To make this easier to understand, I’ll walk through the full process step by step.
- I removed everything from the parent folder, and after restarting Bloody Esports, I received several warnings that the last used folder was missing:
"C:\Program Files (x86)\BloodyEsport\BloodyEsport\Data\Mouse\English\ScriptsMacros\GunLib\CS2" not exits!! - Go to MACRO -> File Options -> New Folder and create a folder, for example CS2. After creating it, the folder should appear in the Directory window.
- Select the macro type, for example A -> Single. Bloody Esports will immediately show this message: "You must create a new combo file to edit".
- Click Yes and enter the macro file name, for example test_hi. The program will add the category and name to the corresponding fields.
- Click the keyboard icon. A new input block will appear with a key in the center and a small arrow on the left side. The arrow shows the action type. Arrow down means key press, and arrow up means key release. Set the key to h and leave the arrow as a press action.
- Click the timer icon to add a delay. A normal click or key press usually uses a 50 ms press duration. Bloody Esports adds a 64 ms timer by default, and I do not know exactly why it uses 64 ms. My guess is that this is the default delay between actions.
- Using the same logic, add the i key and then save this test macro: File Options -> Save. A confirmation window will appear. Click SAVE.
- Go to the BUTTON tab, choose the button you want to use, for example Right Button, and click the small arrow/checkmark on the right side. In the dropdown list, select: Select Combo File -> CS2 -> A-test_hi
- Click APPLY in the lower-right corner. Bloody Esports should show the confirmation message: "[ Script Saved ]"


Your first macro is ready. Open Notepad and click the right mouse button. It should type: hi.
To restore the right mouse button back to its normal function, click the small arrow/checkmark next to A-test_hi, then choose: Mouse -> Right Button.
If you want to reset everything back to default, click the update icon to the left of APPLY and confirm the action.
If you already have a ready-made macro file, place it inside your folder, for example CS2, and then bind it through: Key -> Select Combo File -> CS2 -> macro_file
Mouse Profiles
Profiles are one of the most useful parts of Bloody Esports. On the ES9 mouse, the main profile has 9 programmable buttons because the Left Button cannot be remapped there. The other six profiles can use all 10 buttons. In theory, that gives up to 69 possible button assignments: 9 on the main profile plus 60 across the other six profiles.
To manage profiles, click the MODE icon in the upper-right corner of the BUTTON tab. There you can rename profiles and change the hotkeys used to activate them.
For example, in the context of CS2:
- Rename Gaming2 to Test Profile 1.
- Bind your test macro to Left Button.
- Rename Gaming3 to Test Profile 2.
- Bind your another test macro to Left Button.

If you want to switch between different test profiles, press Ctrl + Alt + 2 or Ctrl + Alt + 3. To return to the default profile, press Ctrl + Alt + 1.
Simple, fast, and convenient.
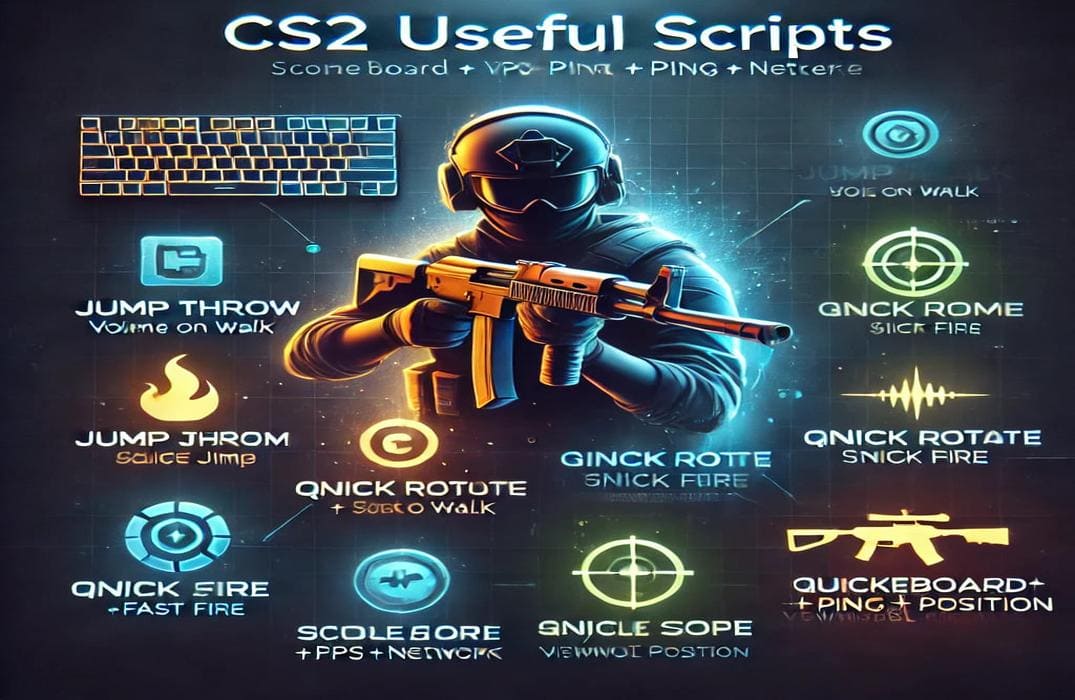
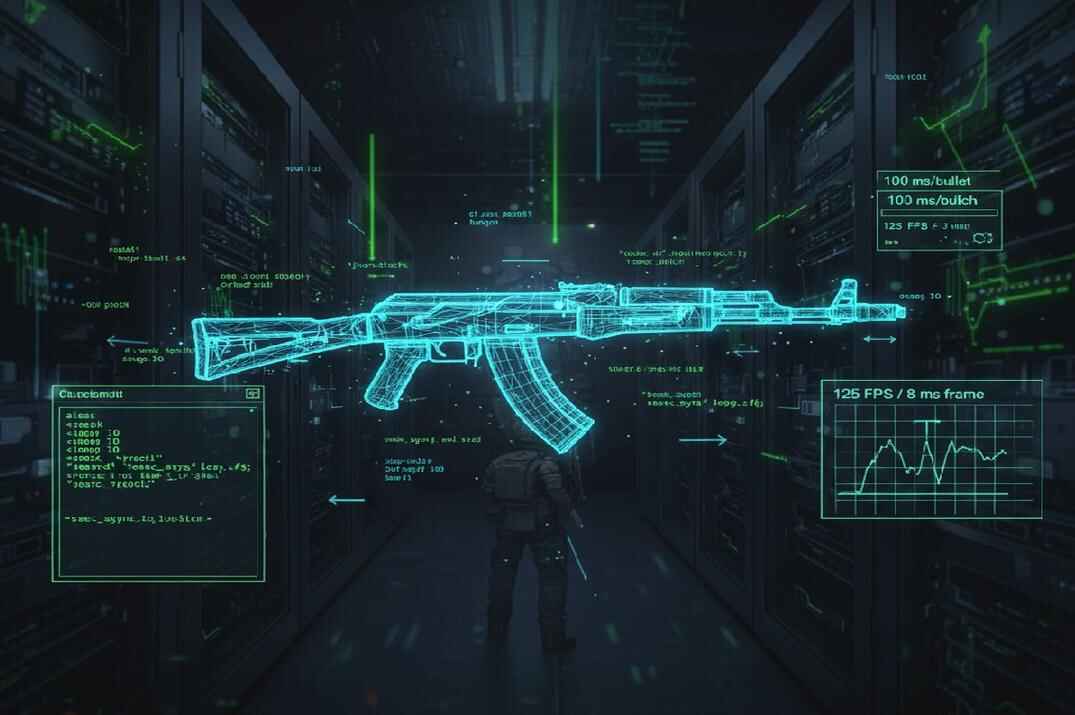
CS2 Macro Examples for Bloody Esports
The examples below are shown for educational testing and macro editor understanding only. I do not recommend using gameplay automation in CS2 Competitive or Premier modes.
Below are several Counter-Strike 2 macro examples for Bloody Esports. They show how one macro can combine delays, button presses, button releases, and repeat modes.
Burst Fire Macro
The Burst3 macro is a simple shooting macro that holds the left mouse button long enough to fire a short 3-round burst. It is meant for short, controlled bursts at longer distances.

Type is Single, the sequence is:
LMB press -> 179 ms -> LMB release -> 4 msThe short 4 ms break helps separate bursts and gives better control when repeating the macro several times.
CS2 Fast Scope Macro


This is an old idea from Counter-Strike 1.6, where it had many names: Fast Zoom, Fast AWP, Quick Scope, and others. The macro is based on a quick right-click and left-click sequence. It quickly scopes in and fires toward the point you were already aiming at with the center of your screen.

With the AWP in CS2, this trick does not work the same way it did in older Counter-Strike versions, especially at long range. At close distance, though, it can still be useful in some situations.

Type is Single, the sequence is:
RMB press -> 44 ms -> RMB release -> 61 ms -> LMB press -> 14 ms -> LMB releaseCS2 Jump Throw Macro
The classic Jump Throw bind, or more correctly a script, was limited after Valve introduced the cl_allow_multi_input_binds restriction in the August 19, 2024 patch. This command prevents several game actions from being executed through one simple bind chain, such as +jump; +attack.
I already have a separate guide for the regular alias-based Jump Throw script that works around this limitation, but a mouse macro can work even better because of precise timing.

Type is Single, the sequence is:
LMB press -> 55 ms -> Space press -> 107 ms -> LMB release -> 46 ms -> Space releaseCS2 Single-Shot Cycle Macro
The Burst1 macro creates a controlled rhythm of single shots while the assigned button is held. The shooting behavior feels similar to SCAR-20 or G3SG1 tap firing, but faster and more consistent.

Type is Cycle, the sequence is:
LMB press -> 17 ms -> LMB release -> 175 ms -> LMB press -> 17 ms -> LMB release -> 190 msCS2 Tec-9 Macro
The Tec-9 macro imitates repeated left mouse button clicks with fixed timing. Instead of clicking as fast as possible by hand, the macro creates a more even shooting rhythm, which can be easier to control.
Because of that, the Tec-9 starts to feel closer to an automatic weapon. This can be useful for players who struggle to click quickly while keeping the crosshair on target.

Type is Cycle, the sequence is:
LMB press -> 55 ms -> LMB release -> 109 msCS2 Bunny Hop Macro
The Bunny Hop macro imitates repeated Space key presses with a fixed delay. Instead of using commands like sv_cheats 1 and sv_enablebunnyhopping 1, this macro creates its own jump cycle through regular mouse or keyboard input.

Type is Auto, the sequence is:
Space press -> 50 ms -> Space release -> 50 ms
You are not locked to the timing used by the sv_enablebunnyhopping 1 command. The delay can be adjusted manually until the jump rhythm feels comfortable for your movement style.
Bloody Esports Macro FAQ

Can Bloody Esports create macros?
Yes, Bloody Esports has a built-in macro editor where you can create keyboard inputs, mouse clicks, delays, cycles, and toggle-based macros.
What is the difference between Single, Cycle, and Auto macros?
Single runs the macro once after pressing the assigned button. Cycle repeats the macro while the button is held. Auto works like a toggle: press once to start the loop, press again to stop it.
Can I use Bloody Esports macros in CS2?
Technically, yes, Bloody Esports macros can send mouse and keyboard inputs in CS2. But CS2, servers, tournaments, and anti-cheat systems may have their own rules about macros.
How do I reset a mouse button back to normal?
Open the BUTTON tab, click the dropdown next to the assigned macro, and choose the original mouse action again, for example Mouse -> Right Button. Then click APPLY to save the change.