Why Most Scripts Stopped Working in 2024
In Counter-Strike 1.6, the wait command creates delays between actions. That made it useful for many old scripts, including Jump Throws, Burst Fire, Quick Scope and etc. In CS:GO, however, wait was disabled, which removed one of the main ways to build timed scripts.

Then, on August 19, 2024, Valve introduced the command cl_allow_multi_input_binds. With this change, binds that combine multiple gameplay actions - such as +jump; +attack - no longer work on official servers, where the value of the command is locked to 0. As a result, classic jump throw scripts and similar multi-action binds became unusable on official servers.
The New CS2 Jump Throw Script

Here’s the workaround - a script that uses mouse axis bindings to trigger commands indirectly, without breaking Valve’s input restrictions. It works inside the game logic and is fully allowed on official servers.
alias "rst_mouse_y" "bind mouse_y pitch"        // 3
alias "at" "+attack; bind mouse_y rst_mouse_y"  // 2
alias "rst_mouse_x" "bind mouse_x yaw"          // 6
alias "rst" "rst_mouse_x; -jump"                // 5
alias "+jt" "+jump; bind mouse_y at"            // 1
alias "-jt" "-attack; bind mouse_x rst"         // 4
bind "v" "+jt"
How This Script Works - Explained Step by Step
Note the comments //1-6 next to each line - they show the exact order in which each part of the script executes. This helps visualize how the script actually works.
- Pressing the bind (
+jt). When you press your jump-throw key (vin this example), the script immediately performs+jumpand temporarily changes your vertical mouse axis (mouse_y) to call the aliasatinstead of normal pitch movement. Nothing happens yet - until you move the mouse. - Moving your mouse vertically. As soon as you move your mouse up or down, the axis executes the alias
at. That alias does two things: runs+attack(pulls the grenade pin and throws) and instantly re-bindsmouse_yback to normal pitch. - Releasing the key (
-jt). When you release your jump-throw key, the script ends+attack(so the grenade releases) and re-binds your horizontal mouse axis (mouse_x) to run another alias calledrst. Again, nothing happens until you move the mouse. - Moving your mouse horizontally (up). As soon as you move the mouse even slightly left or right,
rstis executed. That alias restores normal horizontal movement (yaw) and ends the jump (-jump).
At this point everything is back to normal - both mouse axes work as usual, and the throw is complete.
The Bind Trick
The "magic" here is that re-binding a mouse axis (like mouse_x or mouse_y) immediately runs the assigned alias if the mouse is already moving.
This method does:
- Avoid using
wait - Avoid combining inputs
- Bypass Valve’s restrictions legally
How to Set Up the CS2 Jump Throw Script
Scripts can be executed manually through the in-game developer console, but the most efficient way is to store them in .cfg files that can be run manually or automatically when the game starts.
Create the Jump Throw Config File
- Go to your CS2 config folder:
...\steamapps\common\Counter-Strike Global Offensive\game\csgo\cfg\ - Create a new text file (e.g.,
my123.txt) and rename it tomy123.cfg. - Open it with a text editor (Notepad), paste your script, and save.
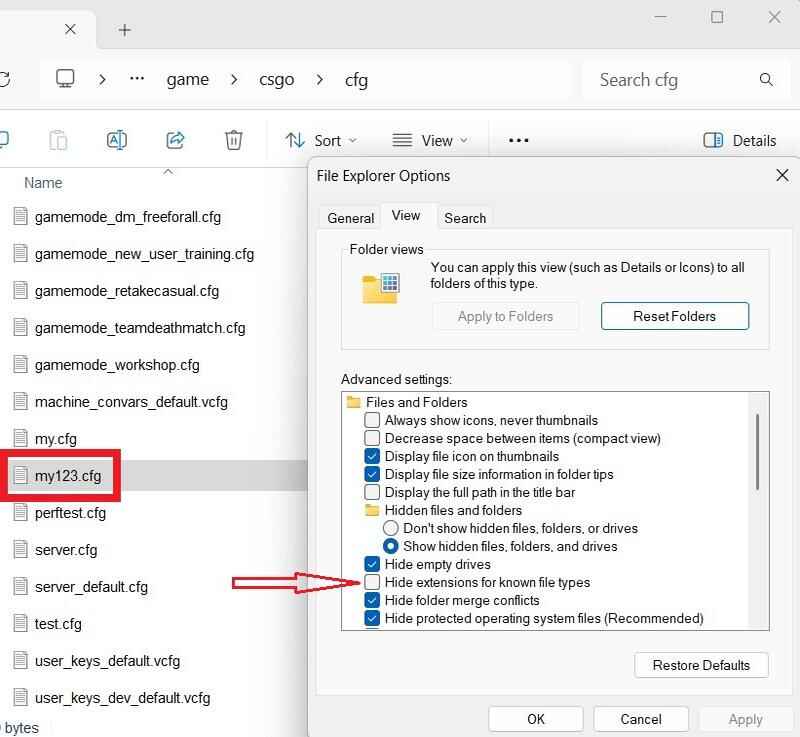
- If you can’t see file extensions:

File extensions visibility in Windows File Explorer - Open File Explorer Options -> View.
- Uncheck "Hide extensions for known file types" box.
Run the Script Through the Console
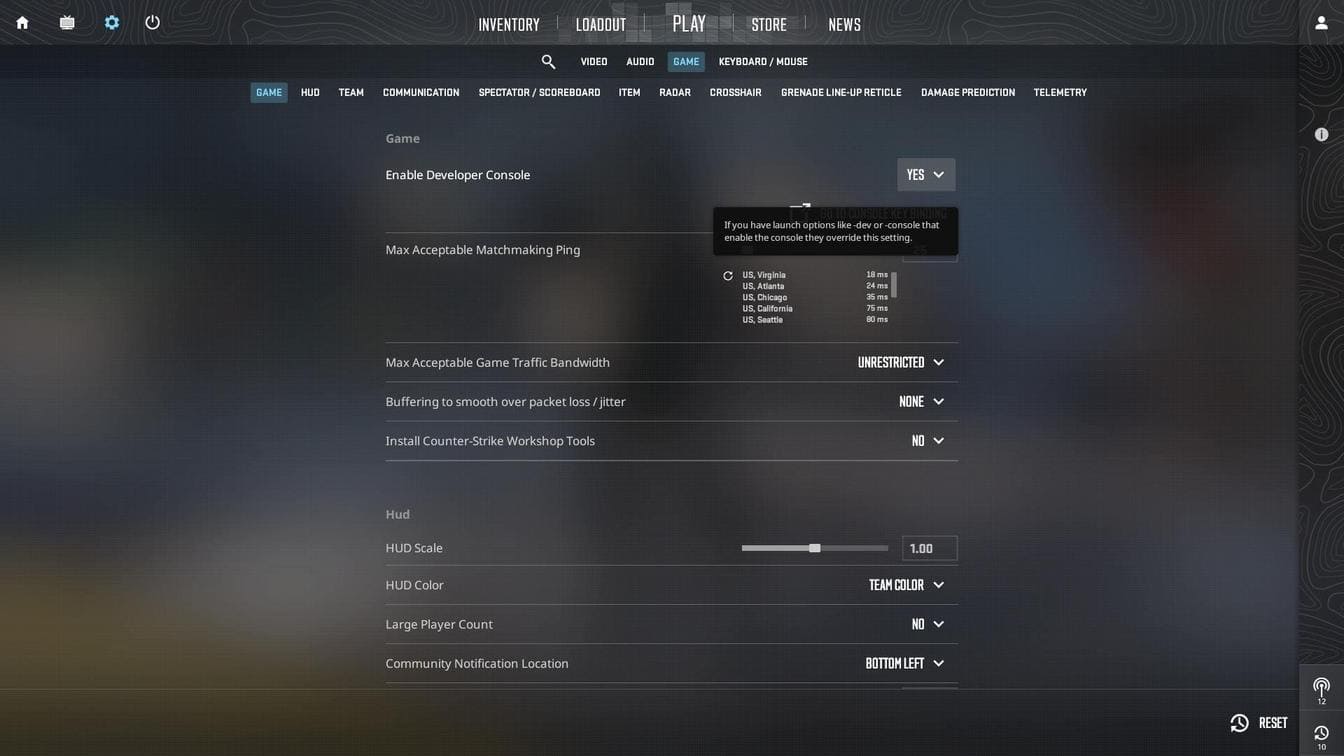
- Enable the developer console in Settings -> Game (Enable Developer Console: Yes).
- Open the console (
~) and type:exec my123 - Press Enter and test your script in-game.
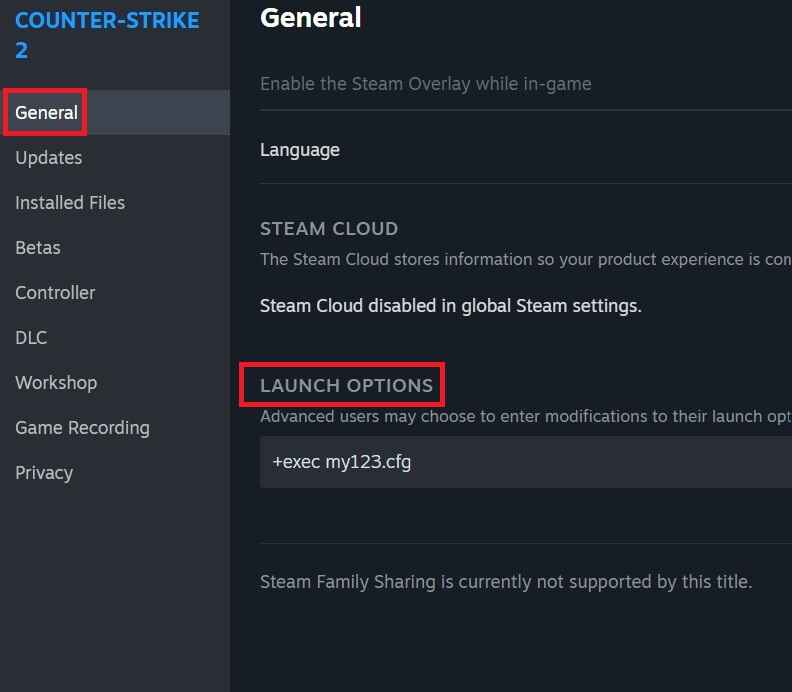
Load the Script Through Launch Options
- In Steam, right-click Counter-Strike 2 -> Properties -> Launch Options.
- Add:
+exec my123.cfg - Launch the game; the script runs automatically.
Load the Script Through autoexec.cfg
- In the CS2 \cfg\ folder, create
autoexec.cfgfile. - Add inside:
exec my123.cfg - (Optional) Organize scripts in subfolders:
- Place the file in
/cfg/myscripts/folder and run:exec myscripts/my123.cfg
- Place the file in

Jump Throw Script Example
exec my123.cfg
echo "Jump Throw Script loaded successfully"
For more tips on managing configs, check out these guides:
CS2 Jump Throw FAQ

Is this jump throw script allowed on official servers?
Yes, it uses only in-game commands and does not combine multiple inputs.
Can this script cause a VAC ban?
No, VAC bans apply only to external software or cheats. This script runs entirely inside the CS2 console system.
Do I have to move my mouse for it to work?
Yes - a slight mouse movement is required. The script triggers on mouse movement to stay within Valve’s input rules.
What if my +attack gets stuck?
Open the console and type -attack. It can happen if you press the bind too quickly multiple times in a row.
Does it work on FACEIT or ESEA?
It depends. Some clients block custom aliases. The script itself is safe, but those platforms may prevent it from executing.
Can I use a different key instead of "v"?
Yes. Just change the bind line - for example: bind "mouse5" "+jt"