Counter-Strike 1.6 Useful Scripts: Complete Guide
Introduction
Counter-Strike 1.6 may be an old game, but it’s still one of the most customizable shooters ever made. Beyond simple settings like mouse sensitivity or graphics options, CS 1.6 gives players access to powerful scripts, aliases, and bind commands. With just a few lines of code, you can bind multiple actions to one key, speed up your buy menu with buy binds, create small automation chains, or simplify repeated actions that would normally require several separate key presses.
Scripts are not cheats - they don’t modify the game itself or give unfair powers. In most cases, they act as practical shortcuts that save time, reduce mistakes, and make gameplay more comfortable. If you want faster buys, cleaner weapon switching, or better control over common actions, Counter-Strike 1.6 scripting gives you extra flexibility.
In this guide, I’ll explain the basics of CS 1.6 scripts, show useful aliases and binds with ready-to-copy code, and explain how to install and use them properly. By the end, you’ll know how to customize Counter-Strike 1.6 scripts for your own style of play.
About CS 1.6 Scripts, Aliases, and Binds
CS 1.6 has a surprisingly powerful scripting system built directly into the GoldSrc engine. It’s not just about faster weapon buys - with a bit of creativity, scripts can automate movement, adjust timing, or even play custom sounds. Over the years, players have pushed these commands to the limit, creating everything from quick-scope AWP chains to endless anti-AFK loops.
CS 1.6 Scripting Basics: bind / alias / wait
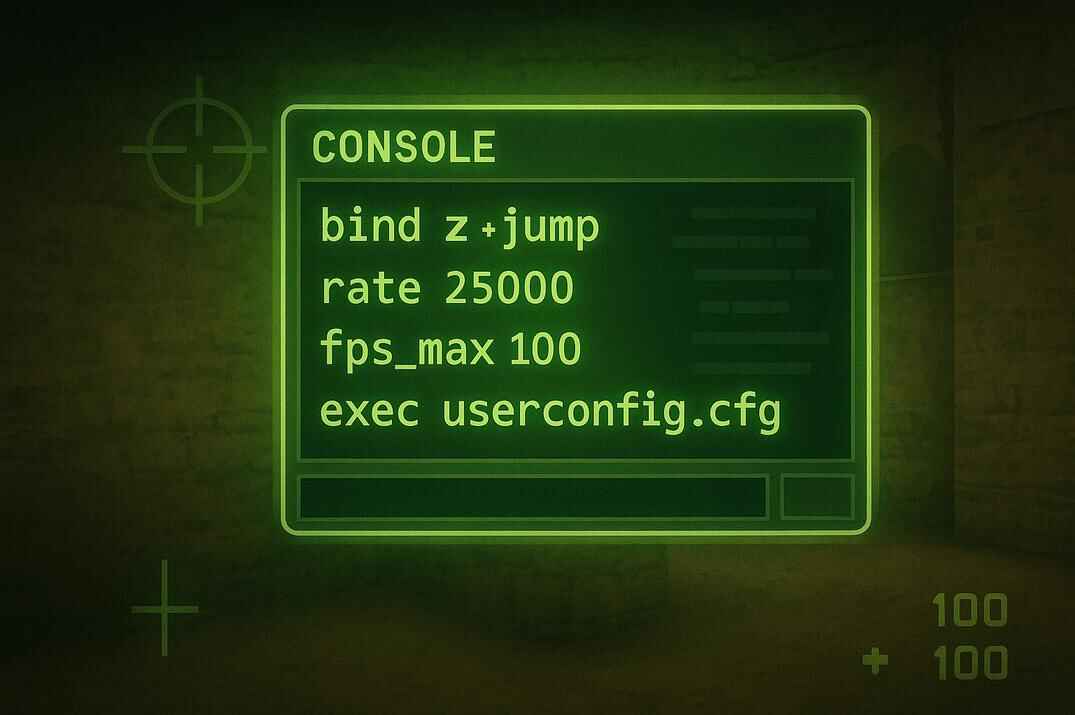
To understand how scripts work in CS 1.6, you only need three commands: bind - attaches a command or script to a key. alias - groups multiple commands together or creates toggles. wait - adds a frame-based delay, allowing sequences and timing.
All of this is stored in config files (config.cfg, autoexec.cfg, userconfig.cfg) that the game executes on startup. By combining bind, alias, and wait, you can turn simple console inputs into powerful shortcuts.
👉 For a full technical breakdown, check our dedicated article: Scripting in Counter-Strike 1.6: Alias, Bind, Wait .
But hey - if you’re into CS2 right now, don’t miss these guides. They’ll help you unlock new tricks, improve your gameplay, and make smart optimizations:
Timing with wait and fps_max
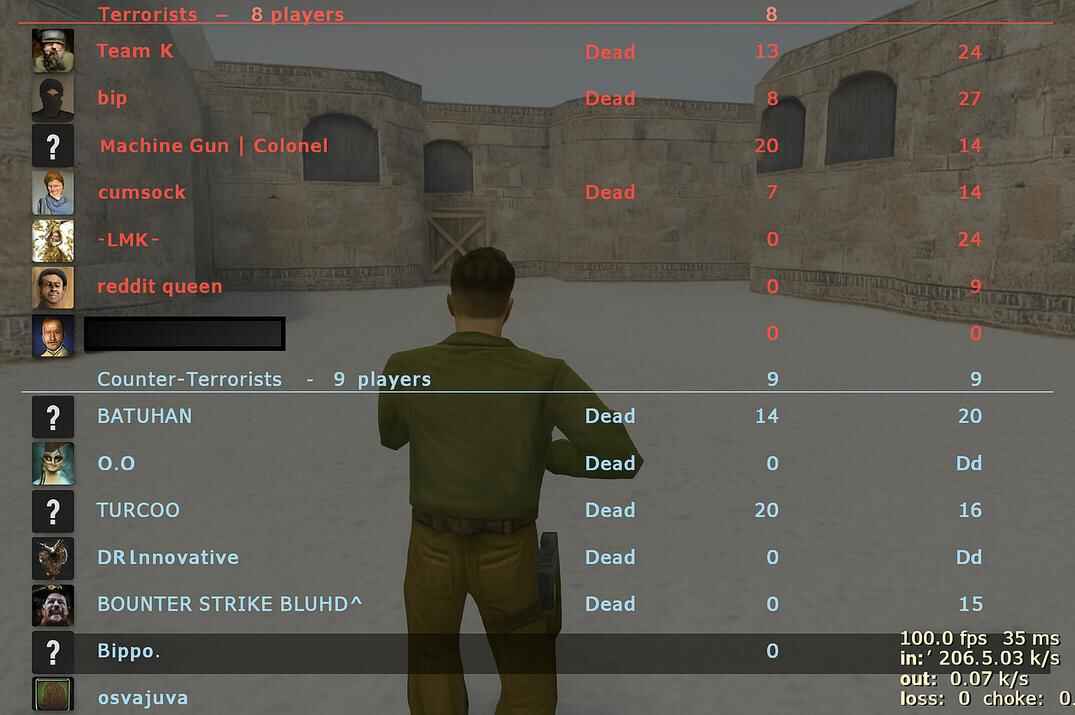
The heart of scripting in CS 1.6 is the wait command. Each wait pauses execution for one frame, so its duration depends directly on your frame rate. With fps_max set to 100, about 80 waits equal one second. By raising or lowering fps_max, you control how fast a script runs - effectively turning the engine itself into a timing tool for every sequence you build.
In Counter-Strike 1.6 the commonly used default FPS limit today is 100. However, in the early years of the Half-Life engine the effective frame rate often hovered around 72 FPS. This wasn’t a strict limit, but rather a typical value caused by vertical sync and the refresh rates of CRT monitors widely used at the time.
As hardware improved and players began disabling VSync, the community gradually standardized around fps_max 100, which became the most common and stable configuration for both gameplay and script timing. To remove this limit:
For Steam client use:
fps_override "1"fps_max "144"orfps_max "240", orfps_max "N"
For non-Steam client use:
fps_override "1"fps_max "144"orfps_max "240", orfps_max "N"
Movement loops and anti-AFK scripts
Every action in CS 1.6 - +forward, +jump, +duck, +attack - can be scripted. By chaining them with alias and wait, players created endless loops where the character runs, jumps, crouches, and shoots automatically. These anti-AFK routines became legendary on public servers and LANs, and they show how flexible scripting in GoldSrc really is.
Anti-recoil experiments
CS 1.6 exposes view-control commands like +lookup, +lookdown, +left, and +right. With precise wait values, scripts can slightly adjust aim after every shot, countering recoil. While far from perfect, these experiments proved that recoil could be influenced with alias chains, giving players a level of weapon control unique to 1.6.
Fast AWP (Quick Scope / Fast Zoom)
The Fast AWP script is one of the most famous in CS 1.6. It chains +attack2 (scope), a short sequence of waits, and +attack to fire instantly, followed by lastinv to switch back to knife. To spectators, it looks like an almost instant scoped shot, much faster than manual input.
The script often required a custom AWP model with a visible crosshair, since the default weapon had none. Others solved it the crude way - by simply drawing a dot on their screen - but the scripting trick itself became a core part of AWP play.
Audio scripting with speak and spk
Scripting in CS 1.6 even extends to sound. Using the Half-Life VOX system, the speak and spk commands can play built-in words, numbers, and phrases. By chaining them with waits, players built custom countdowns, fake radio calls, and even funny taunts that could play during live matches.
Buy binds and utility scripts
One of the most practical uses of scripting has always been buy binds. Entire loadouts - rifle, armor, grenades - can be purchased with a single key. Players also scripted keys to instantly drop the bomb, switch to burst fire, or toggle semi-auto fire modes. These small scripts remain the fastest way to handle gear without losing focus on the round.
Best CS 1.6 Combat Scripts
Combat scripts in CS 1.6 are designed to make shooting actions faster, cleaner, and more consistent. They do not turn you into a machine, but they can remove small delays and make some combat situations feel more controlled.
The Single / Burst Fire Script
This script gives you full control over how your weapon fires in CS 1.6. Instead of holding down the mouse button and spraying, you can bind specific keys to fire a single shot, a two-shot burst, or a three-shot burst. It’s especially useful for rifles like the AK-47 or M4A1, where controlled bursts are far more accurate than continuous fire.
alias "w2" "wait; wait"
alias "w5" "w2; w2; wait"
alias "w10" "w5; w5;"
alias "fire1" "+attack; wait; -attack"
alias "fire2" "fire1; w10; fire1"
alias "fire3" "fire2; w10; fire1"
bind "c" "fire1"
bind "v" "fire2"
bind "b" "fire3"
How it works
Timing aliases
alias "w2" "wait; wait"-> introduces a delay of 2 frames.alias "w5" "w2; w2; wait"-> creates a longer pause (5 frames).alias "w10" "w5; w5;"-> about 10 frames. Withfps_max 100, that’s ~0.1 second, which is an optimal gap between controlled shots.
These aliases are like building blocks: instead of typingwait; wait; wait…every time, you usew5orw10to call a delay.
Firing logic
alias "fire1" "+attack; wait; -attack"-> presses attack, holds for one frame, then releases -> one clean shot.alias "fire2" "fire1; w10; fire1"-> fires once, waits ~0.1 sec, fires again -> controlled two-shot burst.alias "fire3" "fire2; w10; fire1"-> same idea, but adds a third shot.
Bindings
bind "c" "fire1"-> pressC-> one precise shot.bind "v" "fire2"-> pressV-> automatic two-shot burst.bind "b" "fire3"-> pressB-> three-shot burst.
So instead of relying on finger tapping speed, the script automates timing for you. It keeps your bursts consistent and recoil easier to manage.
Toggle Burst Fire Script
This version upgrades the standard burst script by turning it into a toggle bound to C. When activated, your primary fire button (Mouse1) will shoot in three-round bursts. Pressing C again switches it back to normal fire.
alias "w2" "wait; wait"
alias "w5" "w2; w2; wait"
alias "w10" "w5; w5;"
alias "fire1" "+attack; wait; -attack"
alias "fire2" "fire1; w10; fire1"
alias "fire3" "fire2; w10; fire1"
alias "b_fire" "b_fire_on"
alias "b_fire_on" "bind mouse1 fire3; alias b_fire b_fire_off; echo Activated"
alias "b_fire_off" "bind mouse1 +attack; alias b_fire b_fire_on; echo Deactivated"
bind "c" "b_fire"
How it works
By default, Mouse1 is normal full-auto (+attack). Press C once -> Mouse1 changes to a controlled three-shot burst (fire3).Perfect for medium- or long-range spray control. Press C again -> Mouse1 returns to default full-auto.
Each toggle prints a message in the console - Activated / Deactivated - so you always know which mode you’re in.
This script is useful because it replaces the need to press different keys for single or burst fire. Instead, you keep your usual shooting button and switch firing mode only when you need to.
Stop Reload Script
Few things feel worse in CS 1.6 than getting caught mid-reload. You press R, start topping up your clip, and suddenly an enemy swings the corner. Instead of shooting back, you’re stuck watching your character fiddle with the magazine - and you die helplessly.
These scripts fixes that. With a simple key press you can cancel a reload instantly, pull your weapon back into a ready state, and even turn the tables by getting the frag.
Reload Cancel on R
This script modifies the reload key. If you hold R, it behaves like normal reload. But if you release R before the reload finishes, the script cancels it and return the weapon to previous state.
alias "+rel" "+reload"
alias "-rel" "-reload; lastinv; wait; lastinv"
bind "r" "+rel"
How it works
Hold R -> standard reload. Release R early -> instantly cancels the reload animation.
The weapon becomes usable again, letting you shoot instead of waiting helplessly.
Quick Reset on Q
A simpler approach: bind Q to previos weapon, which instantly resets the reload state of your current weapon.
alias "reset" "lastinv; wait; lastinv"
bind "q" "reset"
How it works
Press Q -> your weapon is switched out and back in a split second. This breaks the reload animation and puts the gun back into a ready-to-fire state.
Faster and more straightforward, but it requires a separate key instead of reusing R.
Quick Scope Script (Fast AWP)
The famous fast AWP or Scout script lets you fire almost instantly after scoping in, making it look faster than human reaction. This version includes a toggle so you can switch between normal fire and quick-scope mode whenever you want.
alias "w" "wait"
alias "w2" "wait; wait"
alias "w4" "w2; w2"
alias "w8" "w4; w4"
alias "+hs" "+attack2; w8; +attack; w"
alias "-hs" "-attack; w; -attack2; w2; slot3; lastinv; w8"
alias "trigger" awpON
alias "awpON" "bind mouse1 +hs; alias trigger awpOFF; echo On"
alias "awpOFF" "bind mouse1 +attack; alias trigger awpON; echo Off"
bind "c" "trigger"
How it works
Normal mode -> Mouse1 is just a regular fire (+attack). Press C -> activates quick-scope mode: Mouse1 now scopes (+attack2), waits a fraction of a second, shoots, and instantly switches to knife then back to AWP (slot3; lastinv). Press C again -> returns Mouse1 to default fire mode.
The toggle makes this script practical: you don’t have to bind quick-scope to a separate key. Instead, you just switch modes depending on how you want to play.
Extra notes
Many old-school players used a "DIY" trick: drawing a dot on the center of their monitor for permanent crosshair, especially when quick-scoping. Crude, but it worked 😄.
To make this script effective, you need an AWP or Scout skin with a crosshair overlay (the default AWP has no center dot). You can download several versions here: Counter-Strike 1.6 AWP Skins Collection.
If you’re not sure how to install custom skins, follow my guide: Guide to Customizing Skins in Counter-Strike 1.6.
Anti AFK Script
Many public servers in CS 1.6 use AFK plugins to automatically kick idle players after a short time. While it’s fair, it can also be annoying (wrong timer due wrong configuring) if you just need a quick break. This script keeps your player moving in circles and swinging a knife, tricking the server into thinking you’re still active. Perfect if you want to grab a drink or take a bathroom break without losing your spot in the game.
alias "on" "+attack2; +forward; +left; cl_yawspeed 80"
alias "off" "-forward; -attack2; -left; cl_yawspeed 210"
alias "toggleAFK" "afkOn"
alias "afkOn" "slot3; on; alias toggleAFK afkOff"
alias "afkOff" "off; alias toggleAFK afkOn"
bind "c" "toggleAFK"
How it works
The script uses a toggle system bound to C. Press C once -> your character starts walking forward, spinning in a circle, and swinging the knife (+attack2). Press C again -> movement and attack are disabled, returning controls to normal. cl_yawspeed is adjusted to make the spin smooth while AFK mode is active, then restored to default when you turn it off.
This way, you won’t get kicked for inactivity, and when you’re back, you can immediately jump into the action.
One-Key Defuse with Smoke Cover
This script lets you throw a smoke grenade and start defusing at the same time, while also sending a team message. One key press and your team knows exactly what you’re doing.
alias "+def" "+duck; weapon_smokegrenade; wait; +attack; w80; -attack; wait; say_team I'm defusing; +use"
alias "-def" "-duck ; -use"
bind "c" "+def"
How it works
Press C -> your player crouches, equips smoke, throws it, sends "I'm defusing" to team chat, and begins defusing. Release C -> cancels crouch and stops using.
Best CS 1.6 Movement Scripts
Movement scripts in CS 1.6 focus on jumps, crouch timing, and fast directional actions that are hard to repeat perfectly by hand every time. Things like moving faster or jumping higher in CS 1.6 can often be useful in real gameplay.
High Jump Script
This script combines jump and crouch with carefully placed waits, letting you jump higher and further with a single key. A classic example is the B site on de_inferno: with this script you can easily hop onto the boxes, chain from one to another, and surprise an opponent coming from banana.
It’s a small tweak, but in CS 1.6 movement tricks often decide rounds. Being able to reach such angles or positions can give you a huge advantage.
alias "w2" "wait; wait"
alias "+hj" "+jump; w2; +duck"
alias "-hj" "-jump; w2; -duck"
bind "space" "+hj"
How it works
The script links jump and crouch into a single action. When you press Space, your player jumps, waits briefly (w2), then crouches - giving extra height and distance. When you release Space, it cleanly resets (-jump; -duck). The timing (wait; wait) is tuned for fps_max 100; if you use a different FPS cap, you may need to adjust the delay.
Double Duck script
Double Duck is a classic movement trick in Counter-Strike 1.6 based on a very fast double crouch. When performed correctly, your hitbox drops twice within a fraction of a second. This rapid movement can break the normal footstep sound, allowing you to move almost silently while keeping full running speed.
Because the hitbox briefly changes height, Double Duck can also be useful for subtle micro-peeks or small positional adjustments during fights. The technique isn’t about moving faster - its main purpose is quiet movement and unpredictable hitbox timing.
alias "w" "wait"
alias "w3" "w; w; w"
alias "+dd" "+duck; wait; -duck; w3; +duck"
alias "-dd" "w; -duck"
bind "c" "+dd"
How it works
The script links several crouch commands together with very small delays created by the wait command.
When you press C, the script executes the following sequence:
+duck-> the player instantly crouches.wait; -duck-> after one frame delay the player briefly stands up.w3; +duck-> after three more frames the player crouches again.
This creates the classic duck -> stand -> duck motion that defines the Double Duck technique. As long as the key is held, the player stays crouched at the end of the sequence. When you release C, the command -duck is sent, returning the player to a normal standing position.
But here’s the important part: this is only an example. Every player’s timing feels slightly different depending on their FPS stability, hardware, and even personal rhythm. If the crouch sequence doesn’t "click" for you right away, don’t panic - Double Duck is extremely sensitive to timing, and the wait command behaves slightly differently at different frame rates.
That’s why many players briefly adjust fps_max to make the timing easier to feel. For example, dropping to fps_max 80 can make the sequence smoother and more predictable. Once it feels right, you can switch back to fps_max 100 and keep the same script - the timing will stay consistent as long as your FPS is stable. Experiment with it, trust your own feel, and tweak until the movement becomes natural.
The alternate version that temporarily adjusts your FPS for smoother timing:
alias "w" "wait"
alias "w3" "w; w; w"
alias "+dd" "fps_max 80; +duck; wait; -duck; w3; +duck"
alias "-dd" "w; -duck; fps_max 100"
bind "f" "+dd"
Counter-strafe script
Counter-strafing means releasing one movement key and instantly pressing the opposite one to stop your movement completely. It instantly locks your crosshair, which means your model comes to a complete stop and you can shoot with full accuracy. In CS 1.6, as in all Counter-Strike series, this mechanic is very important but often underestimated.
This script automates the process: when you release a key, it briefly taps the opposite direction, forcing your model to stop dead in place. That gives you a higher chance of landing accurate shots without having to master perfect timing manually. I also added a toggle, so you can turn it on or off whenever you like.
alias "w2" "wait; wait"
alias "w4" "w2; w2"
alias "w8" "w4; w4"
alias "+moveleft2" "+moveleft"
alias "-moveleft2" "-moveleft; +moveright; w8; -moveright"
alias "+moveright2" "+moveright"
alias "-moveright2" "-moveright; +moveleft; w8; -moveleft"
alias "+forward2" "+forward"
alias "-forward2" "-forward; +back; w8; -back"
alias "+back2" "+back"
alias "-back2" "-back; +forward; w8; -forward"
bind "w" "+forward2"
bind "s" "+back2"
bind "a" "+moveleft2"
bind "d" "+moveright2"
alias "trigger" "snap_strafe"
alias "snap_strafe" "bind w +forward2; bind s +back2; bind a +moveleft2; bind d +moveright2; alias trigger regular_strafe; echo On"
alias "regular_strafe" "bind w +forward; bind s +back; bind a +moveleft; bind d +moveright; alias trigger snap_strafe; echo Off"
bind "c" "trigger"
How it works
Movement keys (W, A, S, D) are rebound with custom aliases. When you release a key, the opposite direction is tapped for a split moment (w8 delay), instantly stabilizing accuracy.
- Press C to toggle the script On or Off.
- On -> movement keys use counter-strafe logic
- Off -> movement keys return to default behavior.
Console echoes On/Off, so you always know the current mode.
This script is especially useful for rifles like AK-47 or M4A1, where standing still for that first bullet accuracy makes the difference between a hit and a whiff.
Best CS 1.6 Utility and Fun Scripts
Not every useful script in CS 1.6 is about shooting or movement. These are small quality-of-life aliases that make the game more convenient and a bit more personal.
Useful Aliases
Aliases don’t have to be complex chains - sometimes they’re just shortcuts that save time. Why type a full command every time when you can bind it to a couple of letters?
For example, typing "qq" instead of "quit" is faster than writing the full quit command, and "dd" is quicker than "disconnect". Another practical one is "rr" - it starts demo recording instantly the moment you need it (e.g., you suspect a cheater or want to capture a funny moment).
alias "qq" "quit"
alias "dd" "disconnect"
alias "rr" "record demo"
Clean Screenshot script
Want clean screenshots for frag movies or just a minimalist HUD-free look? This script hides all interface elements, takes a screenshot, and then instantly restores everything back to normal.
alias "w2" "wait; wait"
alias "hudOff" "hud_draw 0; cl_observercrosshair 0; crosshair 0; r_drawviewmodel 0; hideradar; scr_centertime 0"
alias "hudOn" "hud_draw 1; cl_observercrosshair 1; crosshair 1; r_drawviewmodel 1; drawradar; scr_centertime 1"
alias "takeSS" "hudOff; w2; snapshot; w2; hudOn"
bind "c" "takeSS"
How it works
Press C -> the script disables HUD, radar, crosshair, viewmodel, and center messages. Then it executes the snapshot command, which saves a screenshot in .bmp format. By default, the file is stored in your main CS 1.6 directory (the same folder as hl.exe). The filename includes the map name and a counter, e.g. de_dust0000.bmp, de_dust0001.bmp. After the screenshot is taken, the script automatically re-enables HUD and all other elements.
This way you don’t have to manually toggle settings every time - one key press gives you a clean screenshot and then restores your interface.
One-Key Plant and Team Alert
This script plants the bomb and notifies your team automatically.
alias "+plant" "weapon_c4; wait; +duck; wait; say_team I planted the bomb; +attack"
alias "-plant" "-duck; -attack; say_team Bomb has been planted"
bind "c" "+plant"
How it works
In Counter-Strike 1.6, spk and speak are GoldSrc engine console commands used to play sounds through the console. They can reproduce many built-in words as well as .wav files stored in the \cstrike\sound\ directory. The spk command is simply a shorter form of speak - both work the same way. They are often used in binds, scripts, and plugins, including server-side plugins such as AMX Mod X.
Grenade Throw Scripts
Sometimes in CS 1.6 you want to overwhelm your opponent with utility. Instead of manually selecting and throwing grenades one by one, these scripts let you bind a key to instantly throw two flashes in a row, all grenades you carry, or even a custom sequence.
Script for Throwing Two Flashbangs
alias "w2" "wait; wait"
alias "w10" "w2; w2; w2; w2; w2"
alias "w40" "w10; w10; w10; w10"
alias "w80" "w40; w40"
alias "fl1" "weapon_flashbang; wait; +attack; w80; -attack"
alias "fl2" "weapon_flashbang; wait; +attack; w80; -attack"
alias "fl" "fl1; w80; w40; w10; fl2"
bind "c" "fl"
How it works
Binds key C to automatically throw two flashbangs one after the other. Uses wait delays so the game properly registers each throw. Great for blinding multiple angles before pushing a site.
Throw All Grenades Script
alias "w2" "wait; wait"
alias "w10" "w2; w2; w2; w2; w2"
alias "w40" "w10; w10; w10; w10"
alias "w80" "w40; w40"
alias "gr1" "slot4; +attack; wait; -attack; w80; +attack; wait; -attack"
alias "gr2" "slot4; +attack; wait; -attack; w80; +attack; wait; -attack"
alias "gr3" "slot4; +attack; wait; -attack; w80; +attack; wait; -attack"
alias "gr4" "slot4; +attack; wait; -attack; w80; +attack; wait; -attack"
alias "gr" "gr1; w80; w40; w10; gr2; w80; w40; w10; gr3; w80; w40; w10; gr4"
bind "c" "gr"
Binds C to cycle through all grenades you carry (slot4) and throw them one by one.
Script with a Custom Throw Order (Flash, HE, Flash, Smoke)
In the previous script, grenades are thrown one by one without control over the sequence. This version lets you set a specific order - for example: Flash -> HE -> Flash -> Smoke.
alias "w2" "wait; wait"
alias "w10" "w2; w2; w2; w2; w2"
alias "w40" "w10; w10; w10; w10"
alias "w80" "w40; w40"
alias "gr1" "weapon_flashbang; +attack; wait; -attack; w80; +attack; wait; -attack"
alias "gr2" "weapon_hegrenade; +attack; wait; -attack; w80; +attack; wait; -attack"
alias "gr3" "weapon_flashbang; +attack; wait; -attack; w80; +attack; wait; -attack"
alias "gr4" "weapon_smokegrenade; +attack; wait; -attack; w80; +attack; wait; -attack"
alias "gr" "gr1; w80; w40; w10; gr2; w80; w40; w10; gr3; w80; w40; w10; gr4"
bind "c" "gr"
How it works
Binds C to throw grenades in a specific order: Flash -> HE -> Flash -> Smoke. Gives you full control over the sequence, instead of relying on random order. Perfect for planned rushes where timing and utility layering matter.
Feel free to test these scripts in your game environment and adjust the wait times to find the optimal throwing pattern for your play style.
Audio Scripts in CS 1.6
In Counter-Strike 1.6, spk and speak are GoldSrc engine console commands used to play sounds through the console. They can reproduce many built-in words as well as .wav files stored in the \cstrike\sound\ directory. The spk command is simply a shorter form of speak - both work the same way. They are often used in binds, scripts, and plugins, including server-side plugins such as AMX Mod X.
How to Play a .wav File
The file must be placed inside a folder within the \cstrike\sound\ directory, for example:
...\cstrike\sound\somefolder\somefile.wav
...\cstrike\sound\weapons\ak47-1.wav
When calling the file, the .wav extension does not need to be specified.
spk weapons/ak47-1
bind "c" "spk weapons/ak47-1"
How to Build Words and Sentences
- p (pitch) -> changes the pitch of the voice during playback; default value: 100 (
p100) - t (time) -> changes the playback speed; default value: 0 (
t0). For example, t20 makes playback roughly 20% faster. Negative values are not allowed - s (start) -> sets the starting point of voice playback; default value: 0 (
s0) - e (end) -> sets the ending point of voice playback; default value: 100 (
e100)
All values are percentages from 0 to 100.
Using these attributes, you can build your own words, phrases, and even full sentences. The maximum command length is 255 characters.
For example, take the word silent: speak "silo(e55) vent(s20)"
- "
silo(e55)" means the sound stops at 55% of its playback, so only "sil" is heard - "
vent(s20)" means the sound starts from 20% of its playback, so only "ent" is heard
For more advanced effects, attributes can be combined: speak "silo(p80e50) vent(p80s20)"
You can also use special symbols: speak "hello _comma _period computer"
- _comma -> pause of 0.24 seconds
- _period -> pause of 0.43 seconds
These symbols can also be replaced with a regular comma and space: speak "hello, computer"
List of Reserved Words
a, accelerating, accelerator, accepted, access, acknowledge, acknowledged, acquired, acquisition, across, activate, activated, activity, adios, administration, advanced, after, agent, alarm, alert, alien, aligned, all, alpha, am, amigo, ammunition, an, and, announcement, anomalous, antenna, any, apprehend, approach, are, area, arm, armed, armor, armory, arrest, ass, at, atomic, attention, authorize, authorized, automatic, away, b, back, backman, bad, bag, bailey, barracks, base, bay, be, been, before, beyond, biohazard, biological, birdwell, bizwarn, black, blast, blocked, bloop, blue, bottom, bravo, breach, breached, break, bridge, bust, but, button, buzwarn, bypass, c, cable, call, called, canal, cap, captain, capture, ceiling, celsius, center, centi, central, chamber, charlie, check, checkpoint, chemical, cleanup, clear, clearance, close, code, coded, collider, command, communication, complex, computer, condition, containment, contamination, control, coolant, coomer, core, correct, corridor, crew, cross, cryogenic, d, dadeda, damage, damaged, danger, day, deactivated, decompression, decontamination, deeoo, defense, degrees, delta, denied, deploy, deployed, destroy, destroyed, detain, detected, detonation, device, did, die, dimensional, dirt, disengaged, dish, disposal, distance, distortion, do, doctor, doop, door, down, dual, duct, e, east, echo, ed, effect, egress, eight, eighteen, eighty, electric, electromagnetic, elevator, eleven, eliminate, emergency, energy, engage, engaged, engine, enter, entry, environment, error, escape, evacuate, exchange, exit, expect, experiment, experimental, explode, explosion, exposure, exterminate, extinguish, extinguisher, extreme, f, facility, fahrenheit, failed, failure, farthest, fast, feet, field, fifteen, fifth, fifty, final, fine, fire, first, five, flooding, floor, fool, for, forbidden, force, forms, found, four, fourteen, fourth, fourty, foxtrot, freeman, freezer, from, front, fuel, g, get, go, going, good, goodbye, gordon, got, government, granted, great, green, grenade, guard, gulf, gun, guthrie, handling, hangar, has, have, hazard, head, health, heat, helicopter, helium, hello, help, here, hide, high, highest, hit, hole, hostile, hot, hotel, hour, hours, hundred, hydro, i, idiot, illegal, immediate, immediately, in, inches, india, ing, inoperative, inside, inspection, inspector, interchange, intruder, invallid, invasion, is, it, johnson, juliet, key, kill, kilo, kit, lab, lambda, laser, last, launch, leak, leave, left, legal, level, lever, lie, lieutenant, life, light, lima, liquid, loading, locate, located, location, lock, locked, locker, lockout, lower, lowest, magnetic, main, maintenance, malfunction, man, mass, materials, maximum, may, medical, men, mercy, mesa, message, meter, micro, middle, mike, miles, military, milli, million, minefield, minimum, minutes, mister, mode, motor, motorpool, move, must, nearest, nice, nine, nineteen, ninety, no, nominal, north, not, november, now, number, objective, observation, of, officer, ok, on, one, open, operating, operations, operative, option, order, organic, oscar, out, outside, over, overload, override, pacify, pain, pal, panel, percent, perimeter, permitted, personnel, pipe, plant, platform, please, point, portal, power, presence, press, primary, proceed, processing, progress, proper, propulsion, prosecute, protective, push, quantum, quebec, question, questioning, quick, quit, radiation, radioactive, rads, rapid, reach, reached, reactor, red, relay, released, remaining, renegade, repair, report, reports, required, research, resevoir, resistance, right, rocket, roger, romeo, room, round, run, safe, safety, sargeant, satellite, save, science, scream, screen, search, second, secondary, seconds, sector, secure, secured, security, select, selected, service, seven, seventeen, seventy, severe, sewage, sewer, shield, shipment, shock, shoot, shower, shut, side, sierra, sight, silo, six, sixteen, sixty, slime, slow, soldier, some, someone, something, son, sorry, south, squad, square, stairway, status, sterile, sterilization, storage, sub, subsurface, sudden, suit, superconducting, supercooled, supply, surface, surrender, surround, surrounded, switch, system, systems, tactical, take, talk, tango, tank, target, team, temperature, temporal, ten, terminal, terminated, termination, test, that, the, then, there, third, thirteen, thirty, this, those, thousand, threat, three, through, time, to, top, topside, touch, towards, track, train, transportation, truck, tunnel, turn, turret, twelve, twenty, two, unauthorized, under, uniform, unlocked, until, up, upper, uranium, us, usa, use, used, user, vacate, valid, vapor, vent, ventillation, victor, violated, violation, voltage, vox_login, walk, wall, want, wanted, warm, warn, warning, waste, water, we, weapon, west, whiskey, white, wilco, will, with, without, woop, xeno, yankee, yards, year, yellow, yes, you, your, yourself, zero, zone, zulu
Chat Color Cycle Script (25 Colors)
Change the color of your chat text with a single button. Every time you press C, it cycles to the next color - from black, red, and green all the way to yellow, orange, pink, and more.
alias black "con_color 0+0+0"
alias darkergrey "con_color 51+51+51"
alias darkgrey "con_color 66+66+66"
alias lightergrey "con_color 90+90+90"
alias evenlightergrey "con_color 150+150+150"
alias lightiergrey "con_color 190+190+190"
alias lightestgrey "con_color 220+220+220"
alias white "con_color 255+255+255"
alias red "con_color 255+51+51"
alias darkred "con_color 204+0+0"
alias lightred "con_color 255+0+0"
alias green "con_color 0+204+51"
alias darkgreen "con_color 0+102+0"
alias lightgreen "con_color 0+255+0"
alias blue "con_color 0+102+102"
alias darkblue "con_color 0+0+153"
alias lightblue "con_color 0+0+255"
alias purple "con_color 204+0+153"
alias darkpurple "con_color 204+0+255"
alias lightpurple "con_color 255+0+255"
alias brown "con_color 153+153+102"
alias yellow "con_color 255+255+0"
alias orange "con_color 255+102+51"
alias pink "con_color 255+0+204"
alias darkpink "con_color 204+102+153"
alias color "cl1"
alias cl1 "black; alias color cl2"
alias cl2 "darkergrey; alias color cl3"
alias cl3 "darkgrey; alias color cl4"
alias cl4 "lightergrey; alias color cl5"
alias cl5 "evenlightergrey; alias color cl6"
alias cl6 "lightiergrey; alias color cl7"
alias cl7 "lightestgrey; alias color cl8"
alias cl8 "white; alias color cl9"
alias cl9 "red; alias color cl10"
alias cl10 "darkred; alias color cl11"
alias cl11 "lightred; alias color cl12"
alias cl12 "green; alias color cl13"
alias cl13 "darkgreen; alias color cl14"
alias cl14 "lightgreen; alias color cl15"
alias cl15 "blue; alias color cl16"
alias cl16 "darkblue; alias color cl17"
alias cl17 "lightblue; alias color cl18"
alias cl18 "purple; alias color cl19"
alias cl19 "darkpurple; alias color cl20"
alias cl20 "lightpurple; alias color cl21"
alias cl21 "brown; alias color cl22"
alias cl22 "yellow; alias color cl23"
alias cl23 "orange; alias color cl24"
alias cl24 "pink; alias color cl25"
alias cl25 "darkpink; alias color cl1"
bind "c" "color"
How it works
Pressing C cycles through 25 preset chat colors. The script loops back after dark pink -> black. May be useful for adding style or marking yourself in chat.
How to Install and Use CS 1.6 Scripts
Installing scripts in Counter-Strike 1.6 is simple. Scripts are just console commands saved inside configuration (.cfg) files, and the game executes them automatically. You don’t need third-party tools - everything works inside CS 1.6 itself.
Before you begin: It is strongly recommended to set config.cfg as Read-Only by default. Many players accidentally break essential key bindings (movement, buy menu, jump, etc.) and then don’t know how to restore them. To avoid such issues, never edit config.cfg directly. At most, you can add a single line to load your own config (exec myconfig.cfg) - but ideally, don’t touch it at all.
Follow the developers’ practice: put your custom configurations inside userconfig.cfg, which is designed to override the main config safely.
If you want to save your current settings during a match or after changing them in the menu, use the command: writecfg <filename>
For example: writecfg lastchanges.cfg
This will store your current settings in a separate file, which you can later merge into userconfig.cfg. Once merged, you can safely delete the temporary file.
How to Add Scripts in CS 1.6 Manually
- Start CS 1.6.
- Open the console (
~by default). - Type or paste the script commands line by line.
This works, but disappears after you quit the game.
How to Create a Separate Config File
Go to your game folder, Steam: ...\Steam\steamapps\common\Half-Life\cstrike\
For Non-Steam clients the path is: ...\root with hl.exe\cstrike\
- Create a new text file, rename it to
myscripts.cfg - Open it in Notepad, paste your scripts, save and close.
- In CS 1.6, open the console and run:
exec myscripts.cfg
Your scripts will now load instantly.
How to Auto-Load Scripts at Startup
There are several ways to make your script file load automatically.
Steam Launch Options
To set them: Open Steam -> Library -> Right-click Counter-Strike -> Properties -> General -> Launch Options. Add to the end (if you already have options there): +exec myscripts.cfg
Non-Steam shortcut
Right-click on hl.exe icon, select Properties. In the Target field, add: -game cstrike +exec myscripts.cfg
userconfig.cfg
userconfig.cfg running myscripts.cfg by exec command
This file is executed automatically at the end of config loading. It’s the safest place for custom binds and scripts, since it always overrides earlier configs. You can either put your scripts directly here, or just add: exec myscripts.cfg
Your chain of configs will look like this: config.cfg -> userconfig.cfg -> myscripts.cfg.
With this setup, your main config.cfg remains untouched, all custom scripts are safe, and you always know where your changes are stored.
Config Tips
Avoid using autoexec.cfg for configurations. In CS 1.6, autoexec.cfg is executed first. Any commands you put there can be overwritten later by config.cfg or userconfig.cfg. The autoexec.cfg file is used for technical purposes, such as enabling logs (e.g., developer "1") or configuring debugging settings.
Load your config anytime. You don’t need to restart the game to test changes. Any custom config can be loaded through the console at any moment - both in the main menu and during a game: exec myconfig.cfg
Always include the .cfg extension. Unlike CS2, the console in CS 1.6 requires the full filename with the .cfg extension. For example, exec scr.cfg will work, but exec scr will not.
Reset to default if needed. If you run into problems with your controls (for example, after experimenting with binds), use: exec config.cfg This will restore the default game configuration.
Conclusion
Now you’ve seen what scripting in Counter-Strike 1.6 is really about. From small aliases that save a few keystrokes to useful tricks like Fast AWP, Burst Fire, High Jump, and others - you’ve got a whole arsenal of scripts that players have been using for decades.
More importantly, you now know where to put these scripts so they actually work. No more confusion about config files: config.cfg, userconfig.cfg, or a custom myscripts.cfg - you know exactly how to load them, how to protect your configs, and how to use exec whenever you need.
Some of these scripts are purely practical, others are fun experiments, but all of them show how flexible CS 1.6 really is. Try them, tweak them for your own FPS and keybinds, and make the game yours. That’s the beauty of CS 1.6 - it gives you the tools, and you decide how far to push them.
CS 1.6 scripts FAQ
Will I get banned for using scripts in CS 1.6?
No. Scripts based on bind/alias/wait are part of the GoldSrc
engine. VAC never banned for them. Only third-party cheat programs are risky.
Where should I put my scripts?
The best place is userconfig.cfg or a separate .cfg file that you load with
exec myconfig.cfg.
What’s the difference between config.cfg, autoexec.cfg, and userconfig.cfg?
config.cfg is the base file (don’t edit it). autoexec.cfg runs first (technical settings only). userconfig.cfg loads last and is the safest place for user configurations.
Do I always need to type .cfg in exec commands?
Yes. In CS 1.6 you must type the full filename with .cfg (e.g. exec scr.cfg).
Can I load scripts during a match?
Yes, you can exec configs both in the main menu and in-game, without restarting CS 1.6.
How do I reset my controls if I break them with scripts?
Just run exec config.cfg in the console. It reloads the default bindings.
Do scripts work on every server?
Almost always yes. Some admins may dislike certain scripts (anti-AFK, anti-recoil), but technically they run on any server since they’re client-side.
Can scripts make me a pro instantly?
No. They help with comfort, speed, and consistency, but accuracy and game sense still come from practice.
How do I share my scripts with friends?
Just send them the .cfg file. They can place it in their cstrike folder and run
exec filename.cfg.


