CS 1.6 Spray Requirements & Format
Before creating a custom spray in Counter-Strike 1.6, it’s important to understand how the game handles them. Sprays in CS 1.6 aren’t regular images - they’re small 8-bit textures that the engine loads from a special file called tempdecal.wad. To make yours work correctly, you’ll need the right size, color format, and one transparent background color.
Create a CS 1.6 Spray with HL TagConverter
If you want the fastest and most reliable way to create your own custom spray for Counter-Strike 1.6, HL TagConverter is the classic tool that does everything automatically. It accepts almost any image format - PNG, JPG, or BMP - and converts it into the proper 8-bit format used by the game. Unlike other methods, HL TagConverter builds a colorful, fully working spray without any manual preparation.
You can download it from my Counter-Strike 1.6 Tools page or anywhere else online. The program is a single executable file (.exe) and doesn’t require installation - just run it and start creating.
Creating a Color Spray with HL TagConverter


- Open HL TagConverter.
- Click "1. Open Image" and choose any picture - your logo, meme, clan tag, or artwork.
- Click "2. Adjust Image". The program automatically sets the optimal size (
96×96,128×80, or112×96 px). You can tweak it manually - just make sure the total pixel area doesn’t exceed12,286 px. You can also set a transparent background and then press "Apply changes and convert to 256 colors". - Click "3. Save Tag" -> choose "Export to WAD file". Name it tempdecal.wad and save it.


Copy (or replace) this file in your Counter-Strike 1.6 directory: ...\Half-Life\cstrike\
You now have a colorful, ready-to-use spray that always works - even if you didn’t prepare the image manually. HL TagConverter handles everything - size, palette, and transparency - making it the best starting point for quick, high-quality results.
Creating a CS 1.6 Spray with Wally (Manual WAD Editing)
One of the most powerful tools for GoldSrc-based games is Wally. It’s a texture editor for editing WAD (World Art Data) files - archives that store textures and interface elements. Originally developed for Half-Life modding, it also works perfectly for creating sprays in Counter-Strike 1.6.
Unlike HL TagConverter, Wally doesn’t automatically convert image formats - it requires a ready 8-bit (256-color) BMP file. The total size of the image should not exceed 12,286 px. You can save or convert such a file using Paint, Imagine, GIMP, or any reliable online converter.
Manual Spray Creation in Wally


- Open Wally, go to File -> New, and choose "Half-Life Package (wad3) (.wad)", then click OK.
- You’ll see an empty window titled Untitled1.
- Drag and drop your prepared 8-bit BMP image into that window.
- Go to File -> Save As... and name the file tempdecal.wad.
- Save it in your CS 1.6 directory: ...\Half-Life\cstrike\.

Launch the game - your custom spray will now be ready to use.
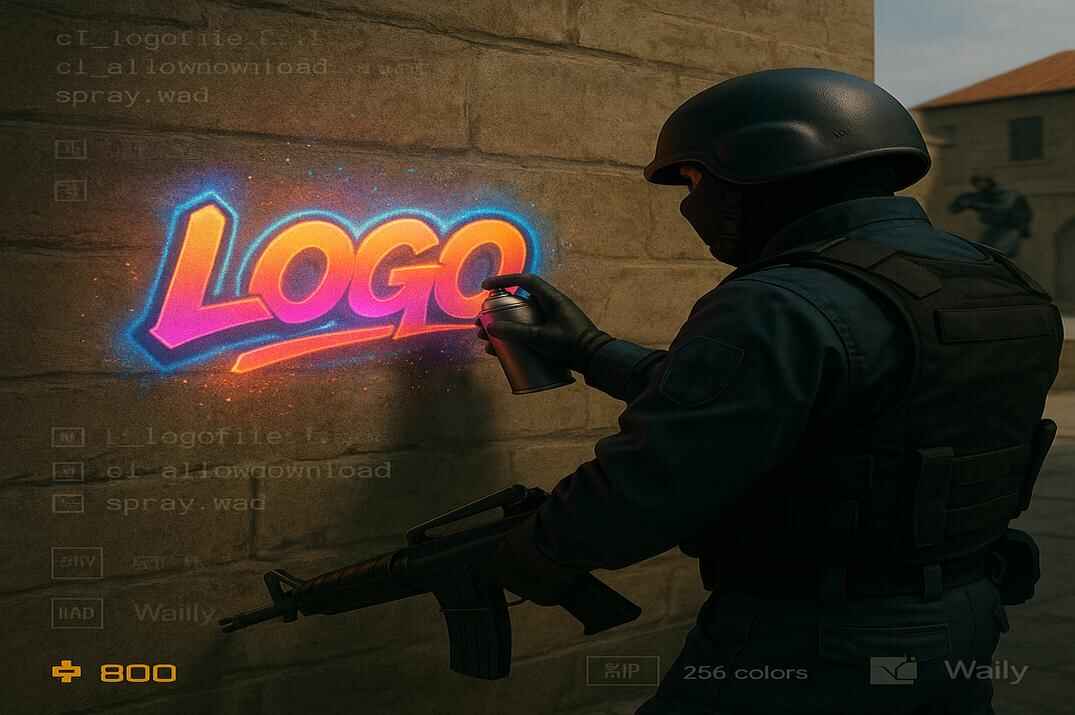
Importing a Spray Using the Classic BMP Method
This is the old-school method built right into Counter-Strike 1.6 - no external tools, no converters, just the game itself. The original Half-Life engine allows importing sprays directly from BMP files stored in the \logos\ folder. When you use the in-game Import button, the game automatically converts your image into tempdecal.wad.
Unlike Wally or HL TagConverter, this approach is limited - you can’t fine-tune colors or transparency. Still, it’s the easiest and quickest way to get your logo working in just a few clicks.
How to Import a BMP Spray
- Create or prepare a small
8-bit (256-color)BMP image - recommended size64×64px. - Place the file in this folder: ...\Half-Life\valve\logos\.
- Launch Counter-Strike 1.6.
- Open Options -> Multiplayer -> Spraypaint Image.
- Select your BMP file and click OK. The game will automatically convert and save it as tempdecal.wad.

Your spray will now appear in-game without any external software. However, this method often produces grayscale or dull colors since the built-in converter doesn’t handle palettes well. If you want precise, bright, and transparent results - HL TagConverter remains the better choice.
Conclusion

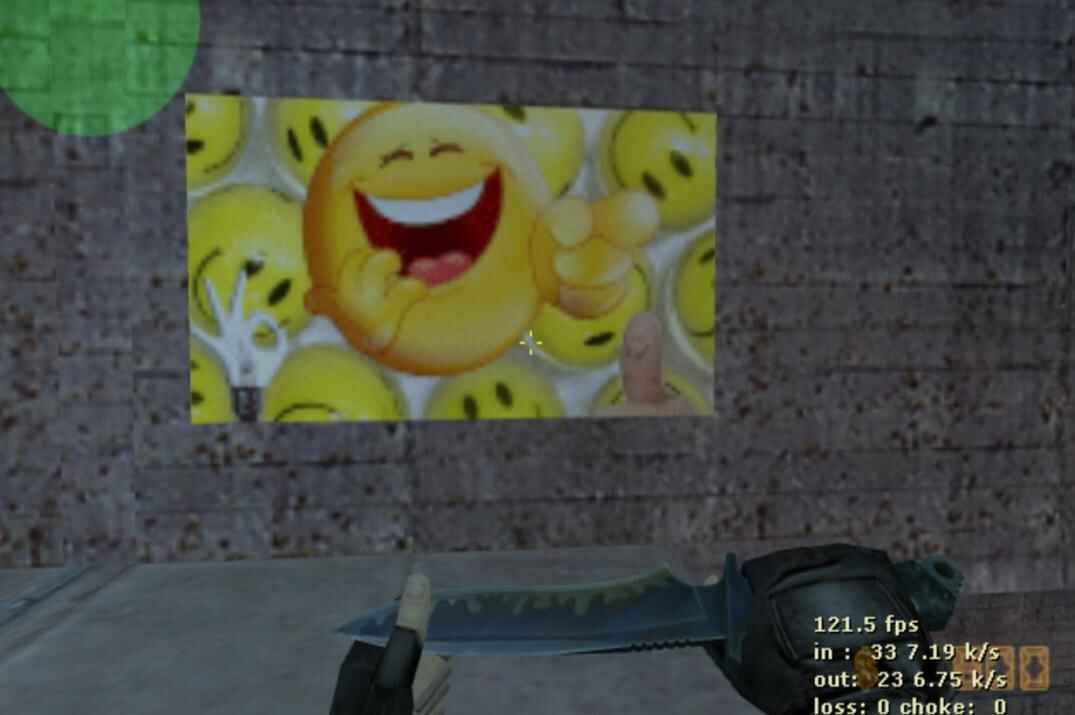
Creating a custom spray in Counter-Strike 1.6 is one of those small but iconic details that make the game personal. Whether it’s your clan logo, a meme, or just your nickname, the right spray gives every round a little extra identity. I always uploaded something funny =).
The simplest and most effective way to make one is still HL TagConverter. It takes any image - PNG, JPG, or BMP - and automatically builds a bright, colorful spray ready for action. No complex setup, no palette headaches, no gray surprises. Just pick your picture, convert, and play.
If you enjoy going deeper into modding and customizing your Counter-Strike 1.6 experience, check out my Counter-Strike 1.6 Tools page. There you’ll find essential utilities used by both beginners and experienced modders:
- Half-Life MDL Decompiler - lets you unpack and edit player or weapon models.
- Half-Life Sprite Viewer - used to preview and inspect .spr files such as muzzle flashes, HUD icons, or crosshairs.
- Half-Life Sprite Wizard - helps you create or convert your own animated sprites for maps or effects.
- Half-Life Model Viewer - the go-to tool for examining 3D models in detail, including textures and hitboxes.
- Valve Hammer Editor - the legendary map editor for creating custom levels and environments.
Each of these tools opens another layer of what makes CS 1.6 truly timeless - the ability to shape the game however you like. So start small with your own spray, explore the modding tools, and see just how much you can create inside the world of Counter-Strike 1.6.
F.A.Q.

Why does my spray appear black and white in CS 1.6?
Because the image wasn’t converted to 8-bit (256 colors) before importing. Convert it first in GIMP, Paint.NET, or IrfanView, then re-import it with HL TagConverter or Wally.
What is the correct file path for my spray?
Your spray must be placed in:
...\Half-Life\cstrike\tempdecal.wadThat’s the file the game loads at startup and sends to servers.
Can I use JPG or PNG images?
Yes. HL TagConverter accepts any common image format (JPG, PNG, BMP) and converts it automatically to the correct 8-bit format.
How do I make the background transparent?
Use one solid background color (for example bright green RGB(0,255,0)) and mark it as transparent during conversion in HL TagConverter or Wally. Partial transparency or soft edges aren’t supported by the GoldSrc engine.
The default spray appears instead of my custom one, even though it works fine on other servers.
That’s normal - many servers intentionally block custom sprays for moderation reasons. Some players used to upload inappropriate or offensive images, so server admins often disable user decals entirely. In such cases, your client automatically falls back to the default spray, and there’s nothing wrong with your setup.
How can I prevent my spray from resetting?
After you’ve set up your spray, go to the file properties of tempdecal.wad and mark it as Read-only. This stops the game from overwriting it on restart.
Does this work on Steam and Non-Steam versions?
Yes - the same process applies to both. The only difference might be the installation folder path, but the spray system works identically.