Home » Counter-Strike 2 » MIRAGE
06/11
MIRAGE
Introduction
Mirage is one of the most popular and well-known maps in both Counter-Strike 2 and the original Counter-Strike 1.6. It’s a favorite for many players because of how well it’s designed for both casual matches and serious competitive play. With its mix of open areas, narrow chokepoints, and vertical angles, the map offers a lot of room for strategy and smart plays. Whether you’re just starting out or you’ve been playing for a while, getting good at Mirage can make a big difference in how you perform. This guide covers everything you need to know, from map callouts to tactics and useful tips.
Overview
Mirage has a very balanced layout, giving both Terrorists and Counter-Terrorists a fair shot at winning rounds. Taking control of the middle part of the map Mid is often the key to turning the tide of the game. With plenty of open space and important choke points, Mirage challenges players to be smart, accurate, and coordinated. Each part of the map has its own purpose and can be used in different ways depending on your playstyle. Whether you’re pushing onto a bombsite or holding down a defensive spot, there’s always a chance to make a difference. Areas like Sniper’s Nest and Palace offer great angles and high ground advantages. Using utility like smokes, flashes, and molotovs, at the right time can help you control space and shut down the enemy’s plans.
About
- Map Type: Bomb-defusal
- Faction Terrorist: Phoenix Connexion, Eastern Europe
- Faction Counter-Terrorist: SAS (Special Air Service), UK
- Location: Morocco
- Release Year: 2013
- Map code: de_mirage
Logo
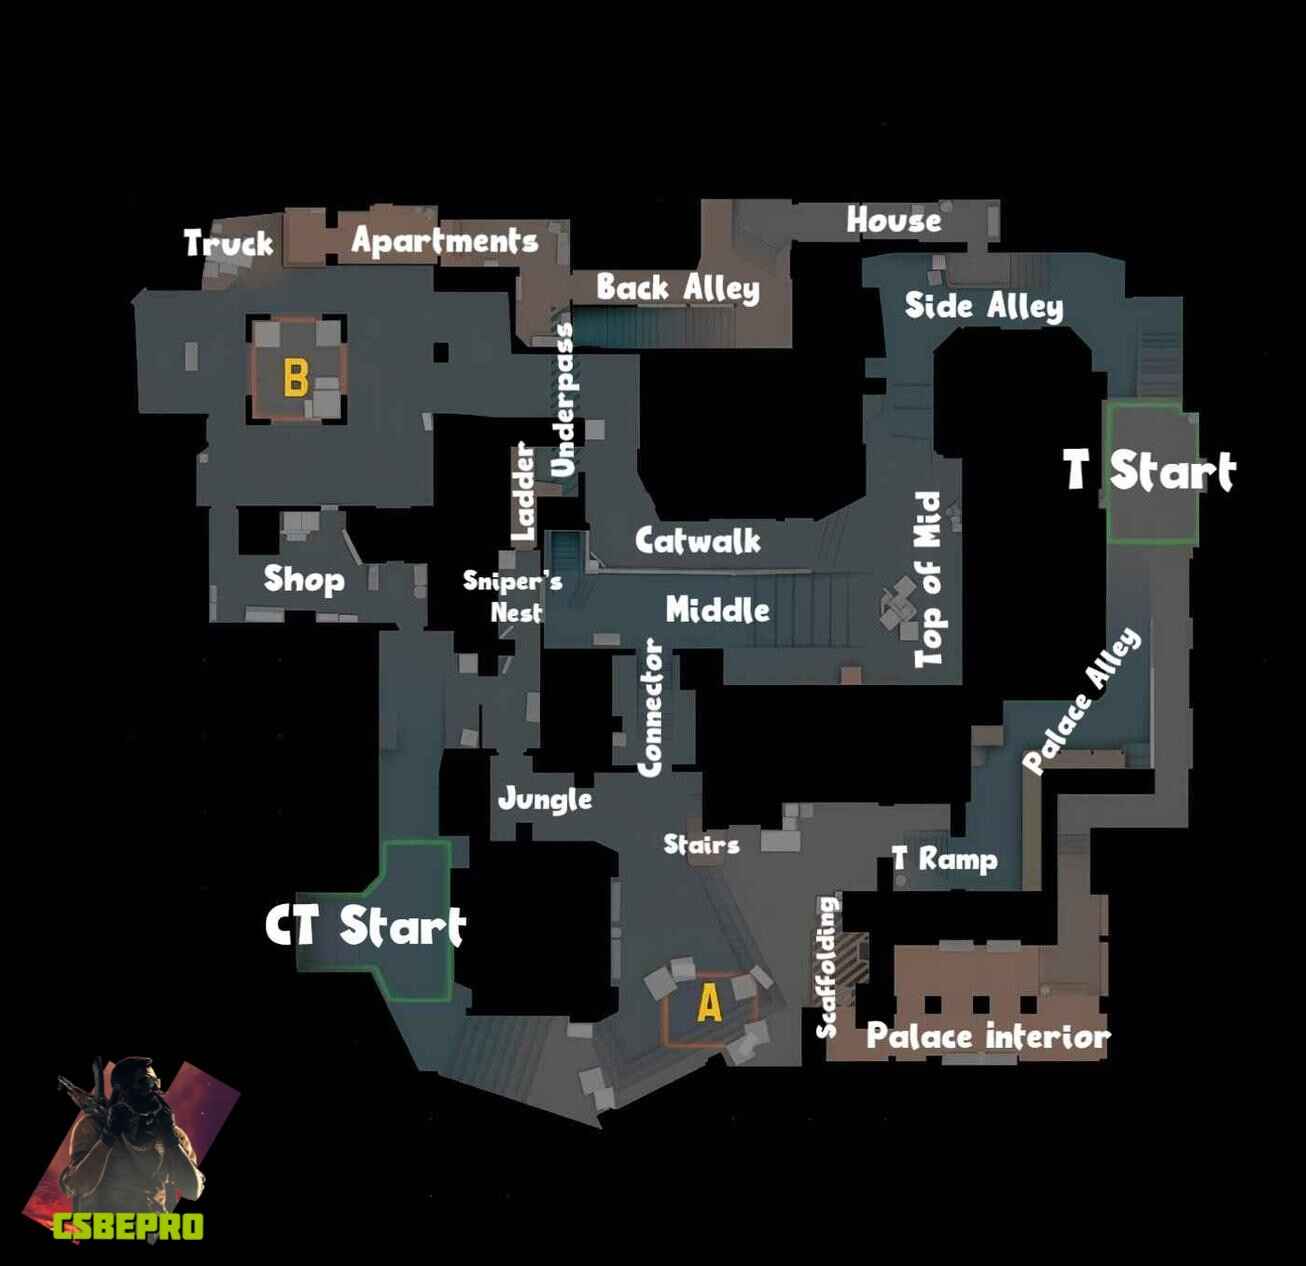
Mirage Map Callouts
T Start – This is where the Terrorists begin the round.
Side Alley – Leads from T Start to Mid; useful for fast rotates or setting up plays.
House – A building near T Spawn that can be used for cover or staging.
Palace Alley – Connects to Palace, heading towards the A Site.
Palace Interior – Inside the Palace; gives you high ground over A Site.
Scaffolding – Located near A Site; can provide cover or a sneaky path.
T Ramp – A popular route for Ts attacking A Site.
Stairs – Offers elevation and a good view of A Site.
Jungle – Connects A Site to Mid; great for rotations.
Connector – A crucial link between Mid and A Site.
Middle – The center of the map; controlling it is vital.
Top of Mid – Where Ts enter Mid from their side.
Catwalk – Runs from Mid toward B; useful for B short pushes.
Ladder Room – A small room linking Mid, Sniper’s Nest, and B Short.
Sniper’s Nest – A powerful CT position overlooking Mid.
Underpass – A hidden path right side from Mid.
Back Alley – Behind Apartments; good for flanks or holding angles.
Apartments – Upper area heading to B Site; often used for B attacks.
Truck – A standard CT holding spot near B.
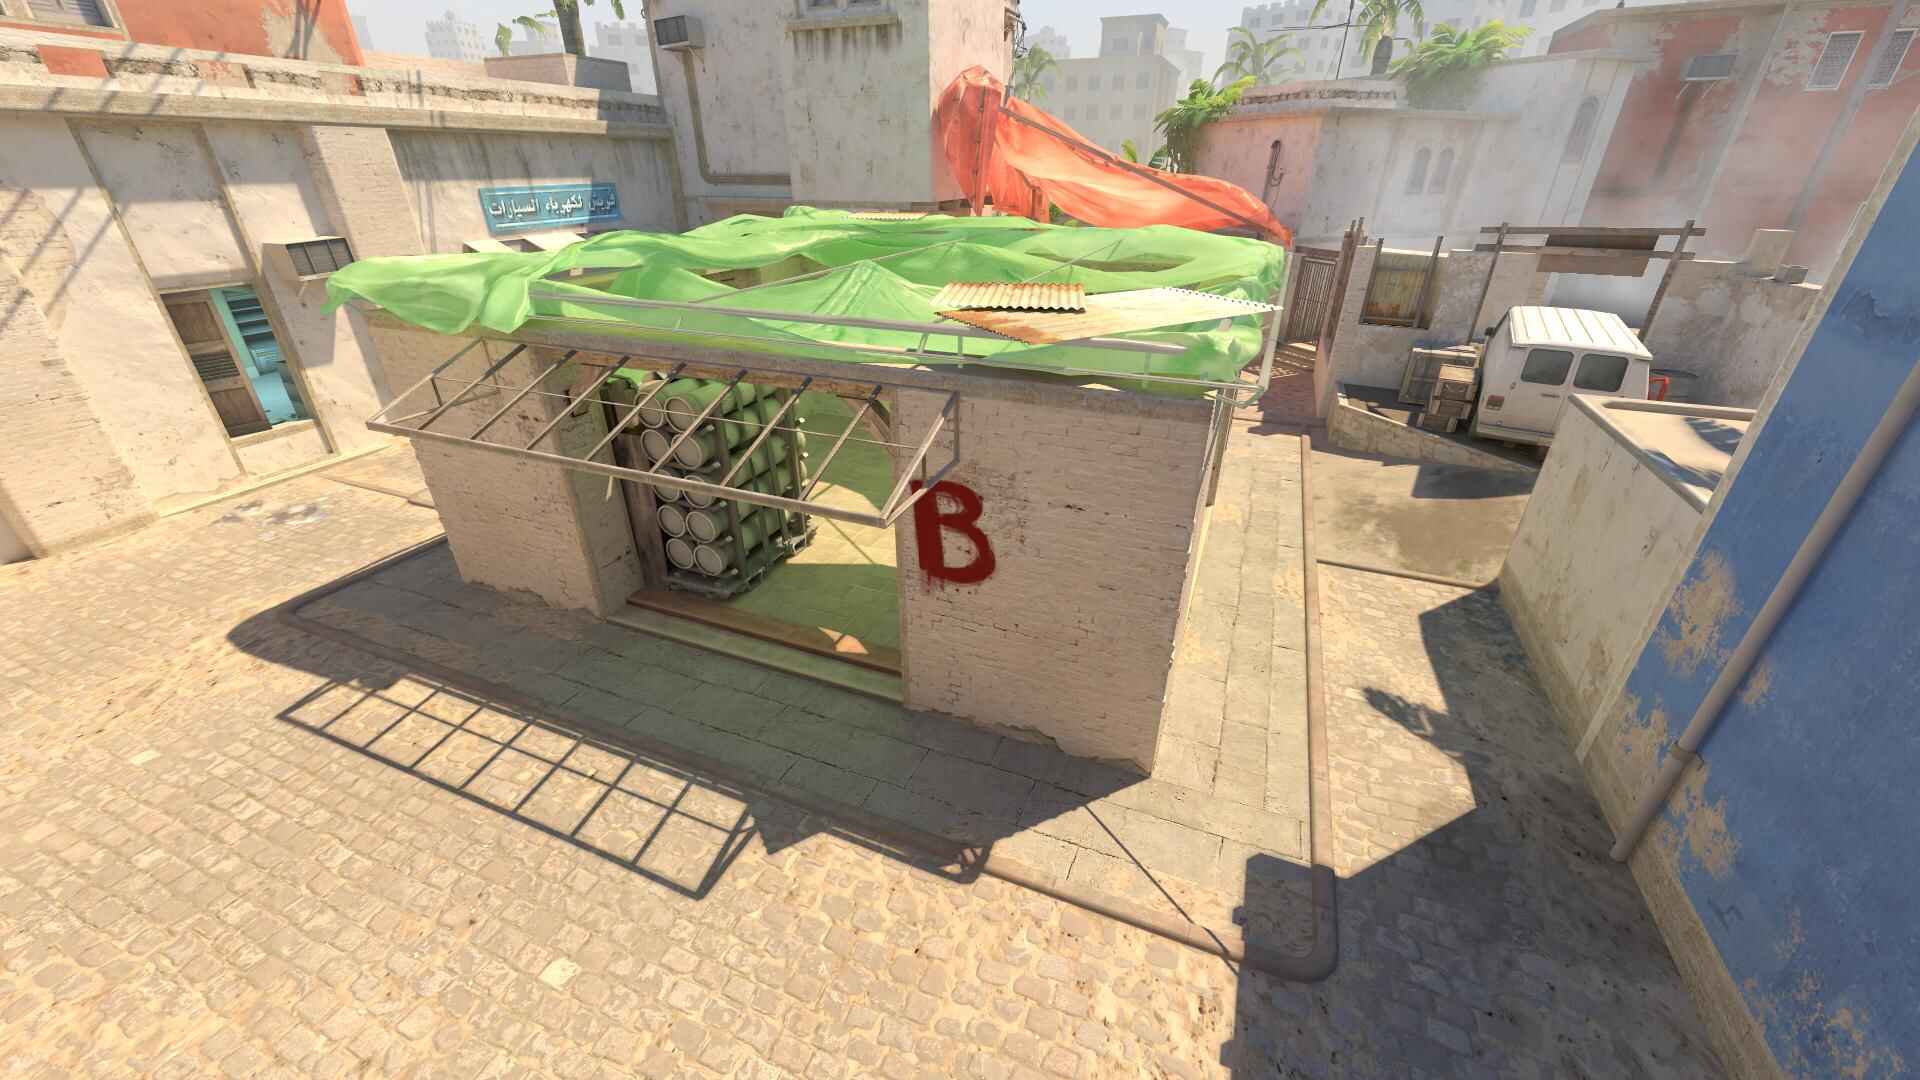
Shop – Near B Site; provides some solid cover.
CT Start – Where Counter-Terrorists begin the round.
Tactical Strategies
Terrorist Side
Getting control of Mid is super important. Use your smokes and flashes to block off CT vision and apply pressure. If you’re planning to hit A Site, throw smokes to cover Jungle, Stairs, and CT spawn, then follow up with molotovs and flashes to clear out defenders. For a fast B rush, throw down your utility quickly and storm the site with speed to catch CTs off guard. Another great approach is to split your attack – hit a site from multiple angles like pushing from Mid and A Ramp at the same time. It can really throw off the defenders.
Counter-Terrorist Side
A typical setup might have one player at B, one covering Mid, and three around A, or you might go with two at B, one Mid, and two at A for better balance. Mid control is super important for CTs too. Use your utility to slow down or deny Ts from getting that control. If you’re outnumbered on a site, don’t try to hold it alone-fall back and go for a retake with your teammates. Use your grenades wisely and set up crossfires to increase your chances.
Tips
Talking with your team is one of the most important things. Call out where the enemies are and what they’re doing so everyone stays on the same page. Always keep your crosshair at head level, this helps you land shots faster. Work on movement tricks like jiggle peeking and strafing to make yourself harder to hit. Also, get good at throwing smokes and flashes. Knowing the right lineups can give you a huge edge when taking or defending sites.
Conclusion
Mirage is a classic for a reason. It’s full of chances to outsmart your opponent, whether you’re pulling off a slick strategy or adapting on the fly. Learning the map, understanding where everything is, and practicing your tactics will go a long way in helping you win. So keep grinding, and soon Mirage will feel like second nature.
Want to sharpen your skills even further? Don’t stop here – check out other classic and competitive maps like Ancient, Anubis, Dust 2, Inferno, Italy, Nuke, Office, Overpass, Vertigo, and Train. Each has its own twists, tactics, and secrets waiting to be mastered.
